Adding Google Play Platform
You will learn how to build your Android app and prepare it for release on Google Play.
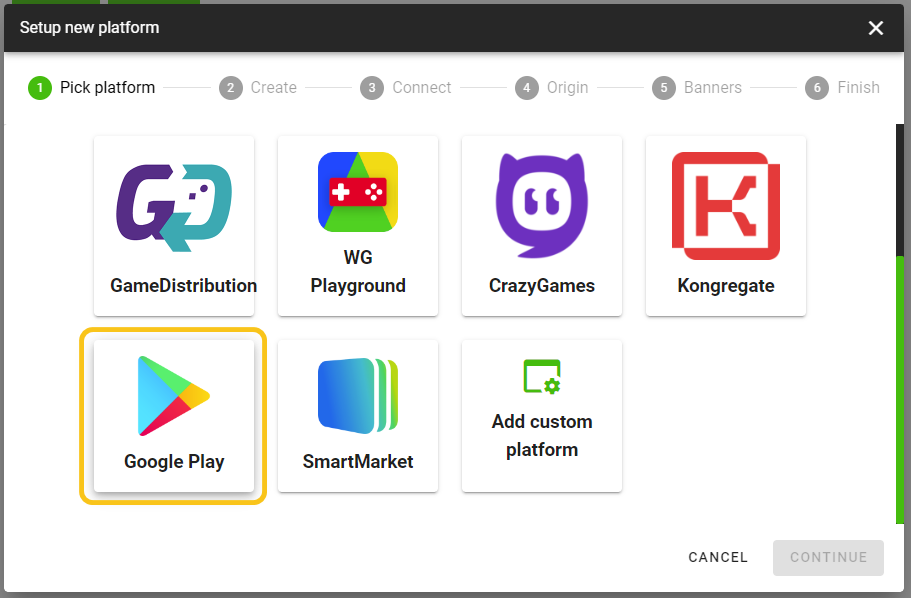
Adding the Platform
- Add the Google Play platform in the Platforms section of your game management panel.
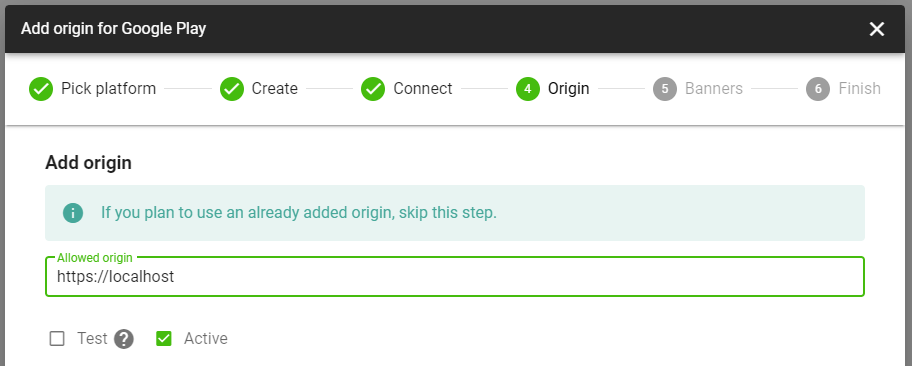
- If you plan to use the web version of the build, add the allowed source
https://localhost.
-
Let's skip the advertising settings for now; we can always come back to them later.
-
Platform setup is complete.
Build Configuration
You can build the application directly on our website from your game archive.
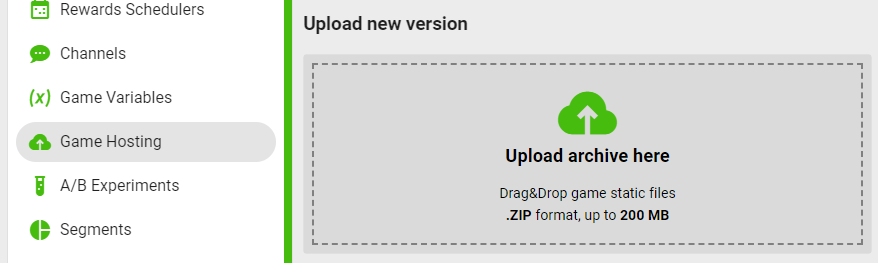
Go to the Game Hosting section and upload the archive with the HTML5 version of your game.
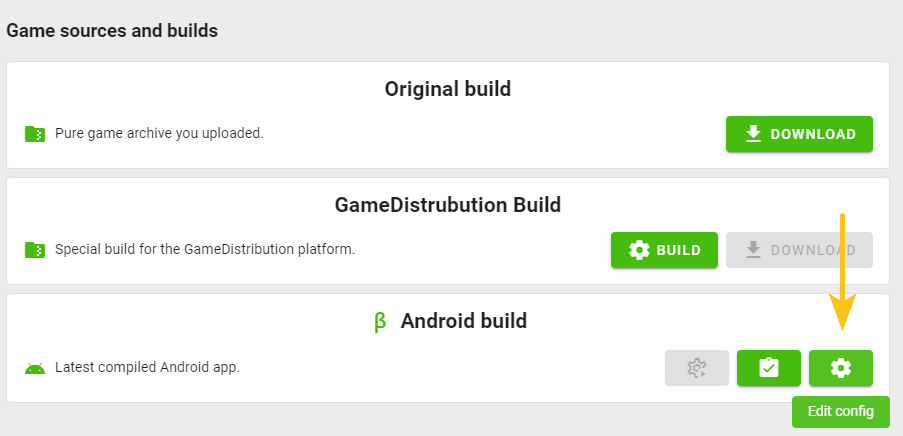
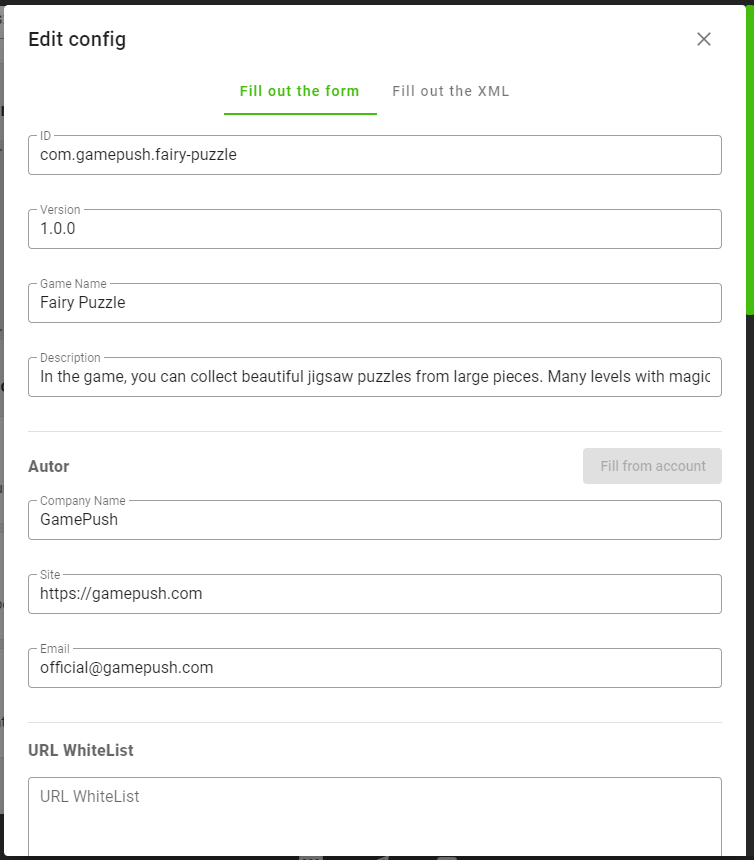
In the Game Sources and Builds section under Android build, click Edit Config.
Fill in the basic information about the game and developer.
-
ID. Specify the package ID in the format
com.companyname.gamenamewithout dashes or special characters. -
Version. The version should be in the format
X.X.XorX.X.X.X.
We automatically increment the version with each build, adding a build number postfix, for example 1.0.0.31b - build version 31. You do not need to manually change the version for rebuilding.
-
Game Name and Description to be embedded in the package. It is recommended to use English. On the Google Play platform itself, you can specify the name and description in any language.
-
Author. Provide author details. You can click Fill from account to pull the details specified in your GamePush account.
-
URL Whitelist. If you want to make the application more secure, you can specify which URLs requests can be made to in the game. Others will be blocked. List separated by commas, for example:
https://gamepush.com/*,
https://api.gamepush.com/*,
wss://ws.gamepush.com
- Fill in the game icon.
![]()
- You can provide a separate icon for each required size or use only 512x512, we will automatically generate icons for each size.
- You can choose an image from already uploaded ones, use a web link for the icon, or provide a relative link to the icon that already exists in your archive.
For relative links to the icon in the archive, add the www prefix, for example, if the icon is located at icons/icon-512.png, the path would be: www/icons/icon-512.png.
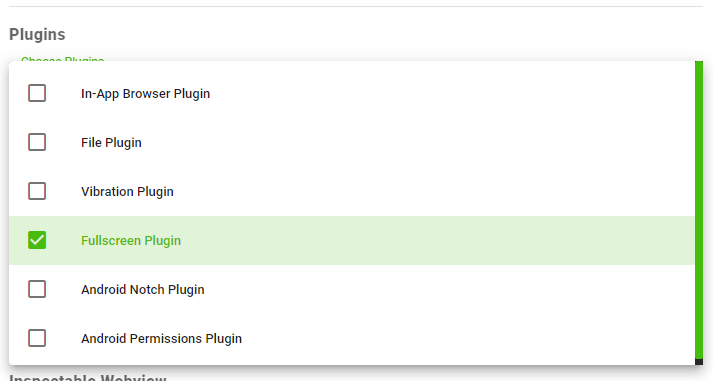
- Select the necessary plugins. If you use features like vibration or file handling.
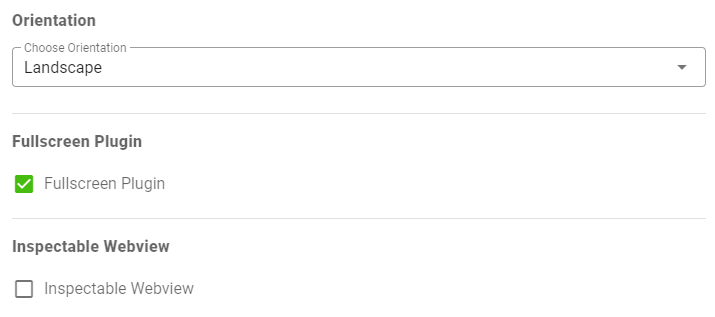
- Set the screen orientation or leave it as Any.
-
Enable Fullscreen mode if you need to hide the phone's status bar.
-
Enable WebView Debugging mode if you want to remotely debug using a PC and view logs. Learn more about debugging.
- Specify the minimum Android version.

Any Android version starting from 7 is suitable for running HTML5 applications through WebView. If you use modern syntax or additional Android plugins, you may need to select a newer version.
- Specify Permissions if you need access to the camera, microphone, or file system. Access to the file system is not needed for local storage.

- Configure the splash screen.

- Specify the icon on the splash screen. You can provide a link in .png format or a relative path to the file in the game directory.
For relative links to the icon in the archive, add the www prefix, for example, if the icon is located at icons/loading-logo.png, the path would be: www/icons/loading-logo.png.
- Specify the splash screen color in HEX format without transparency with the
#prefix. For example,#77bfca.
Example splash screen:

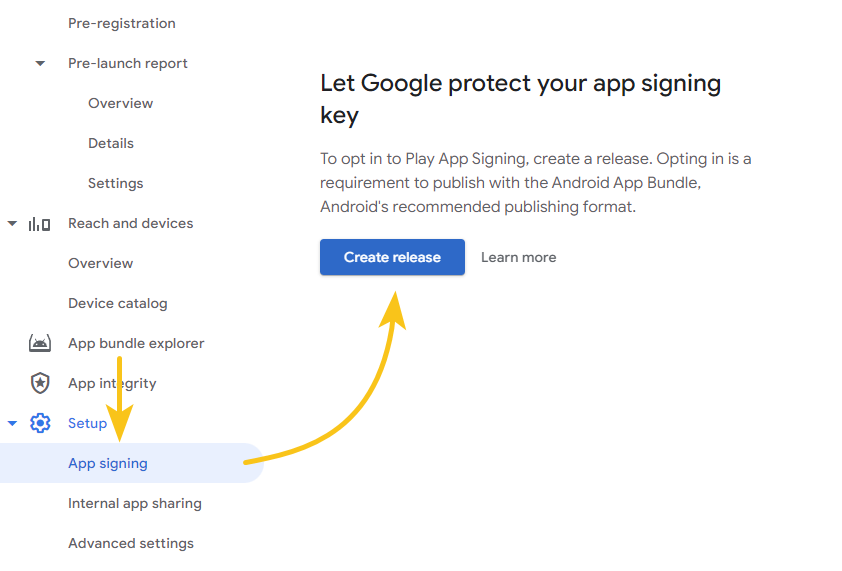
Application Signing
Create an application in Google Play Console.
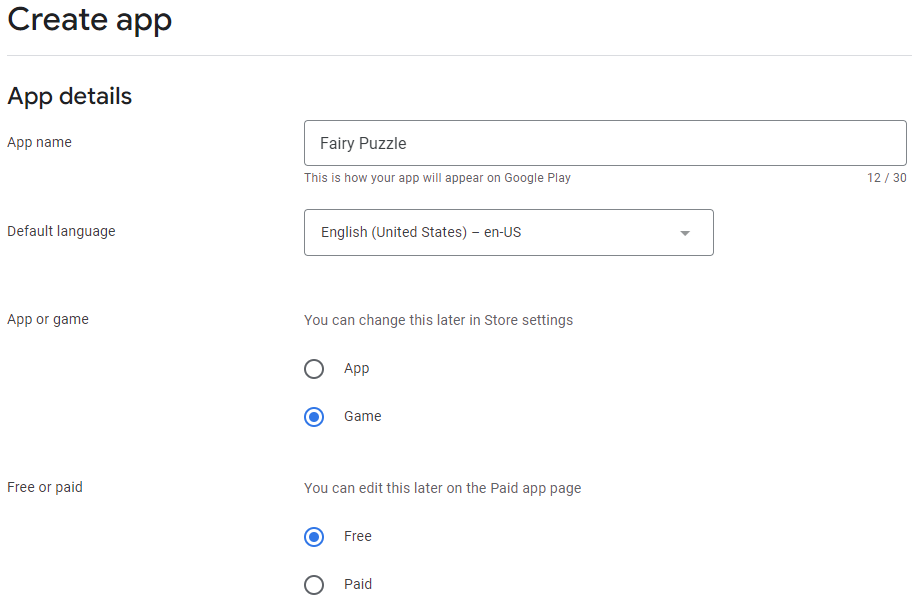
You need to create any release to obtain data for signing the application. This can be a test or public release. For instance, you can create a release under the Internal testing section.
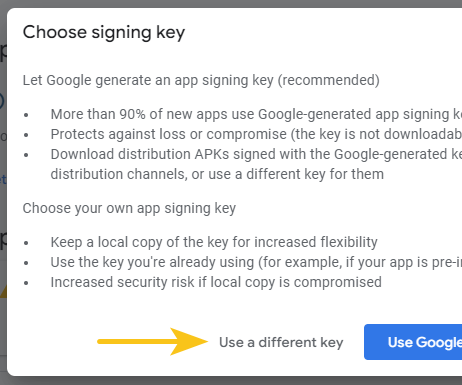
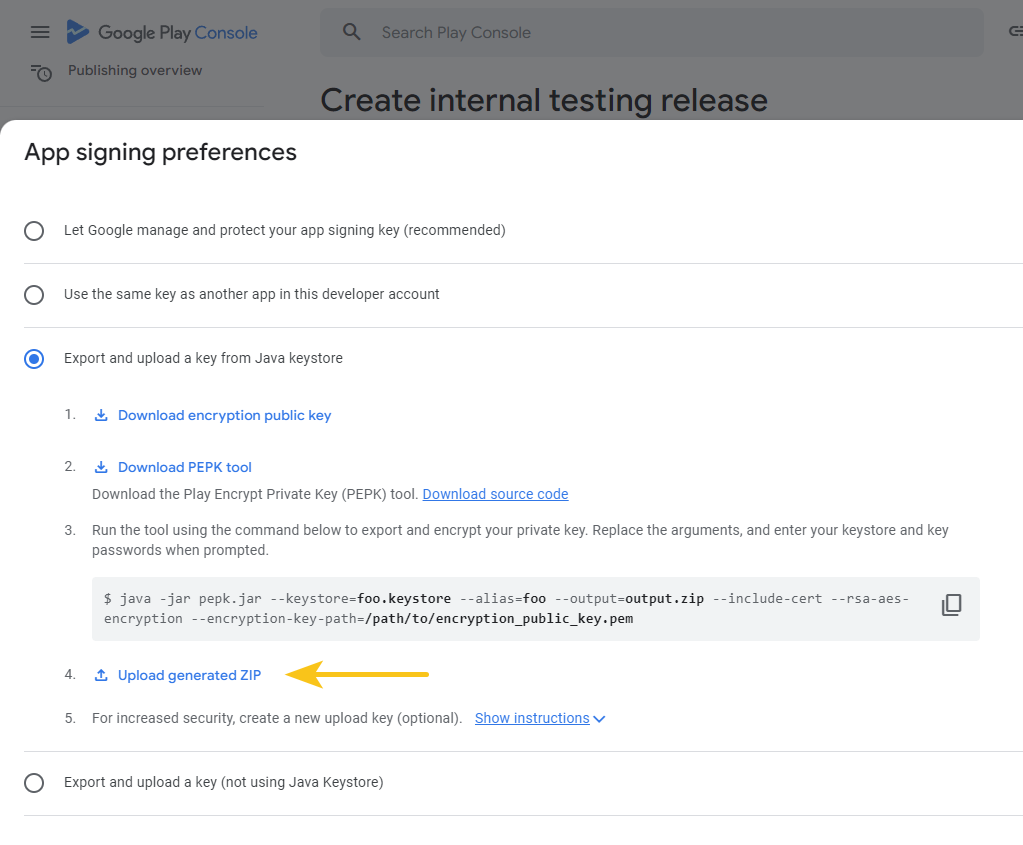
In the release window under App bundles, click Choose signing key.
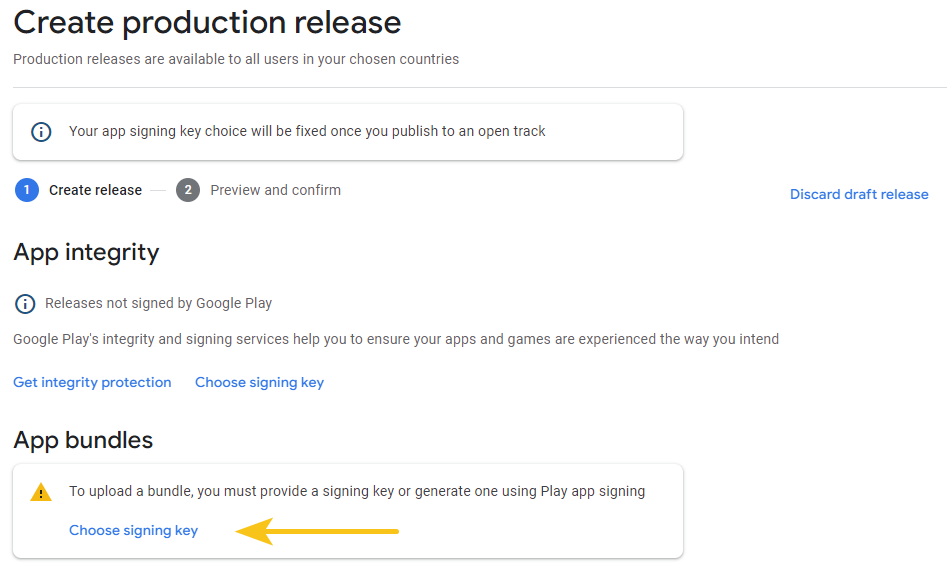
For the builds, you need to create your key, select Use a different key.
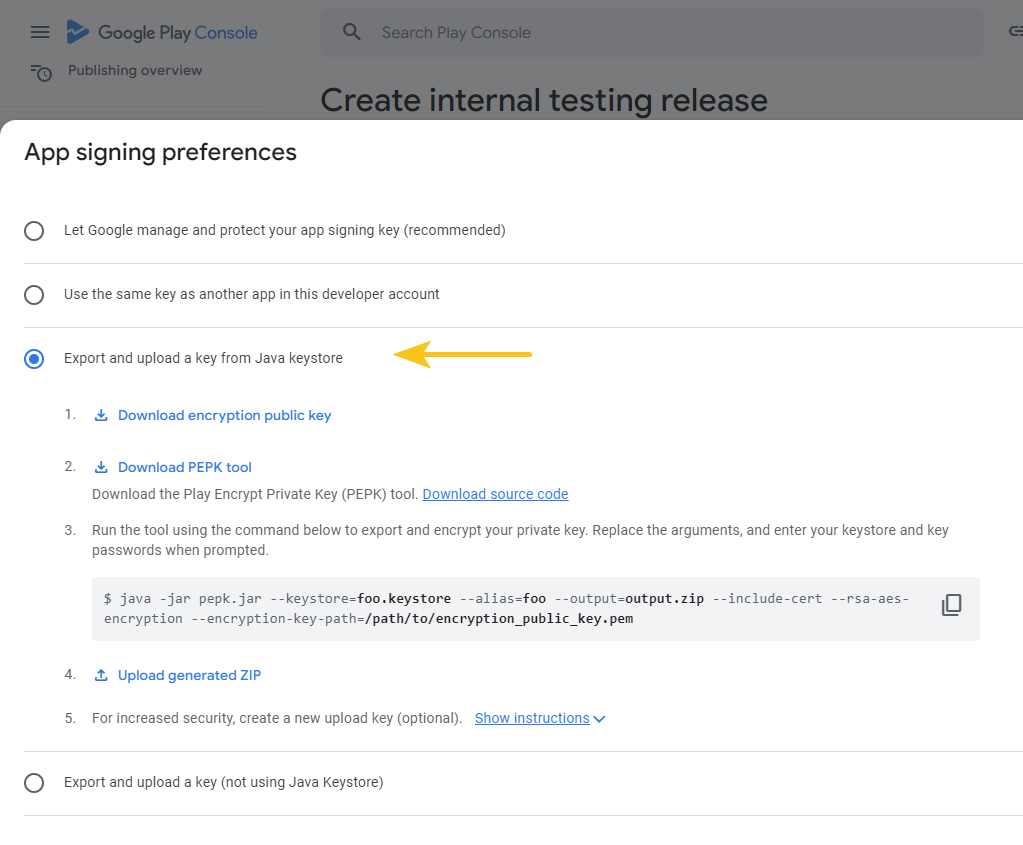
Choose to export and download the key from the Java keystore file.
Generating a Keystore File
-
Download the Encryption public key file.
-
Download the PEPL tool file.
-
Download and install Java, if you don't have it.
- Important: the pepk file may require a Java version different from 8 for execution. You can download Java 11 from this link.
-
Run the key generation command:
keytool -genkey -alias upload -keyalg RSA -keystore upload-keystore.jks -keysize 2048 -validity 365You will need to enter the key password and owner information. Save the password, you will need it.
Alternatively, you can include all details in a single command:
keytool -genkey -alias upload -keyalg RSA -keystore upload-keystore.jks -storepass mypassword -keypass mypassword -keysize 2048 -validity 365 -dname "CN=Jhon Doe, OU=Development, O=My Company Name, L=My City, ST=My State, C=US"C=US- country code.
If the keytool or java commands are not working (not found)
The Keytool comes with Java. Check if Java is installed by running java -version.
Try configuring the Environment Variables and adding the path to Java there.
The output will be the upload-keystore.jks file.
Generating Archive with the Key
Run the key generation command in the directory where the downloaded files from Google Play (encryption_public_key.pem and pepk.jar) and your key file upload-keystore.jks are located:
java -jar pepk.jar --keystore=upload-keystore.jks --alias=upload --output=output.zip --include-cert --rsa-aes-encryption --encryption-key-path=./encryption_public_key.pem
The output will be the output.zip file.
Upload the file to the Google Play console.
Application Build
Signing Configuration
To distribute the application securely so that devices consider it safe, you need to sign the application.
Click the Sign button.

Upload your keystore file. In the previous example, this is the upload-keystore.jks file.

- Enter the Alias you specified when creating the key (in this example -
upload). - Enter the key passwords and save.
You can always delete the key and data at any time. They are required for application building. You can click Delete.
Build the Application
Click the Build button. The build will start automatically from the game archive uploaded to the hosting.

Building usually takes 3-5 minutes.
After the build, you can download the .aab and .apk files.

- Use the
.aabfile for uploading to the Google Play console. - Use the
.apkfile for testing the build or manual distribution.
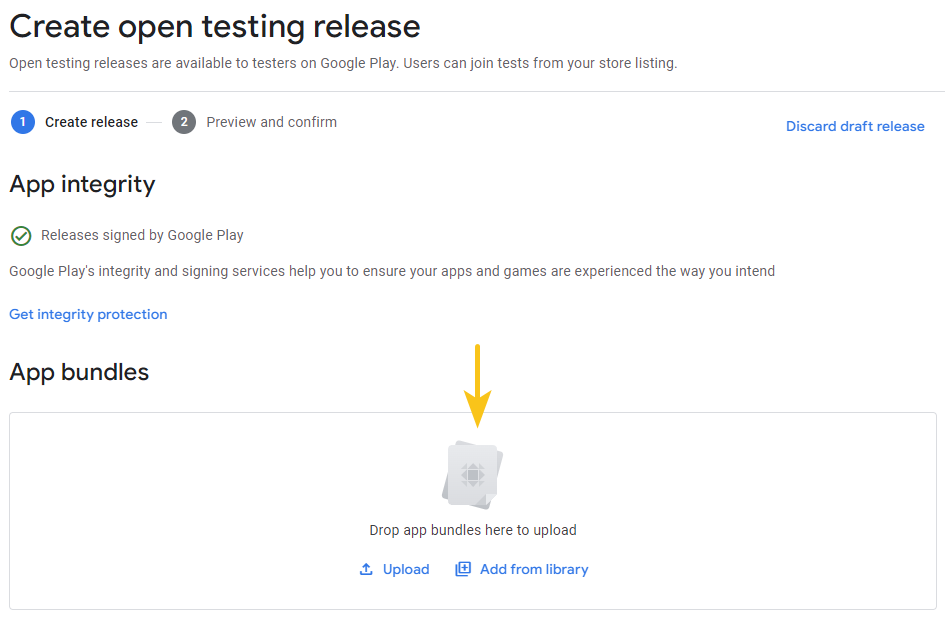
Build Publication
Create a release in the Google Play console. This can be a public release, open testing, or internal testing.
Upload the .aab file on the release page.
In the Publishing overview section, fill in all the items required for publishing the application. Age restrictions, privacy policy, and feature availability surveys.

You can specify our auto-generated privacy policy, which considers the presence of Google Analytics and Yandex.Metrica counters, as well as data processing on our side.
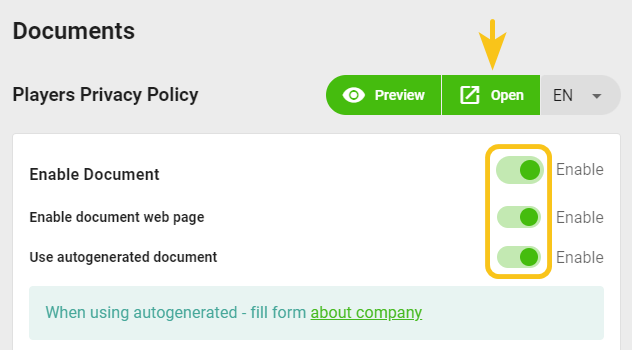
To get the privacy policy link:
- Go to the Documents section in the game management panel.
- Turn on the policy and its webpage.
- You can use the auto-generated policy or upload your own.
- Save the changes.
- Copy the link by clicking Open.
Ad Integration
Easy Monetization Integration
Easy Monetization is a unified solution for ad monetization in applications with 14 ad networks and unified payouts.
To work with the service, you need to register. Visit https://ads.yandex.com/easy and submit a request. A specialist will contact you to help set up the service.
To start working and obtain ad identifiers, your application must already be published.
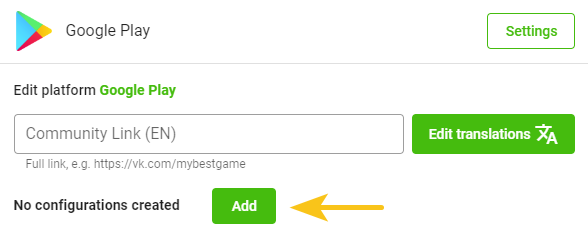
- Add the ad configuration to the Google Play platform. Go to the Platforms section, click Add Configuration under the Google Play platform.
Fill in the configuration.
- Name and description can be anything meaningful for you.
- In the Android section, fill in the banners.
- Choose "Simple Monetization" as the monetizer and provide the banner IDs.
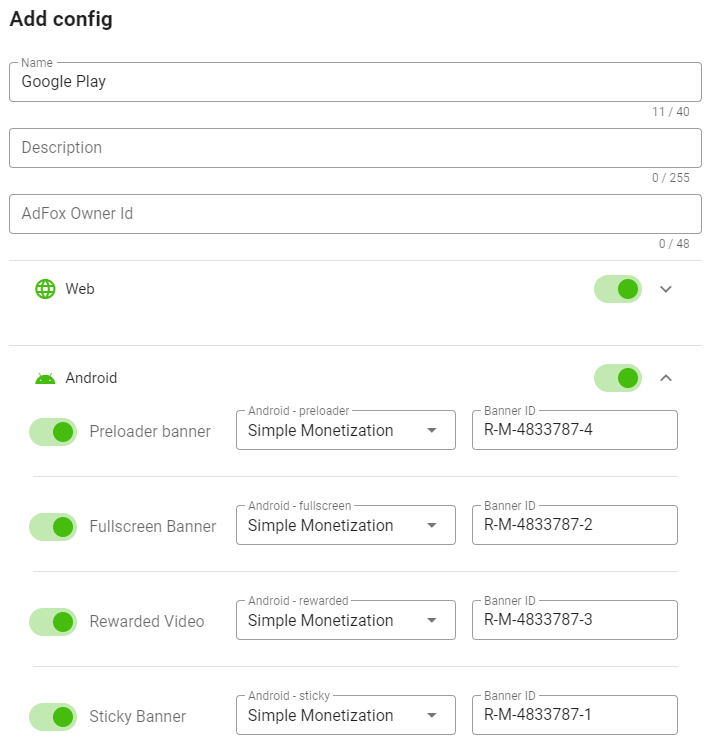
You will be provided with banner IDs, which you can also view in the partner interface.
- Add network identifiers and keys to the build. Navigate to Game Hosting > Android build > Edit Configuration.

- Build the application. The Simple Monetization SDK will be automatically integrated during the build.
Connecting Yandex Advertising Network
To work with the service, you need to register and create an application in the Yandex Advertising Network Partner Interface.
- Add the ad configuration to the Google Play platform. Go to the Platforms section, click Add Configuration under the Google Play platform.
Fill in the configuration.
- Name and description can be anything meaningful for you.
- In the Android section, fill in the banners.
- Choose "Simple Monetization" as the monetizer and provide the banner IDs from YAN.
You can obtain these IDs from the partner interface.
- Add network identifiers and keys to the build. Navigate to Game Hosting > Android build > Edit Configuration.
- Build the application. The Simple Monetization SDK will be automatically integrated during the build.