Construct 3 - Payments
An example of conducting and processing in-game payments.
Before You Begin
To understand the process of working with purchases, it's recommended to familiarize yourself with the current rules described in the documentation.
Important points:
- Supported platforms
- Rules for making one-time purchases
- Rules for making permanent purchases
Adding Purchases to the Personal Account
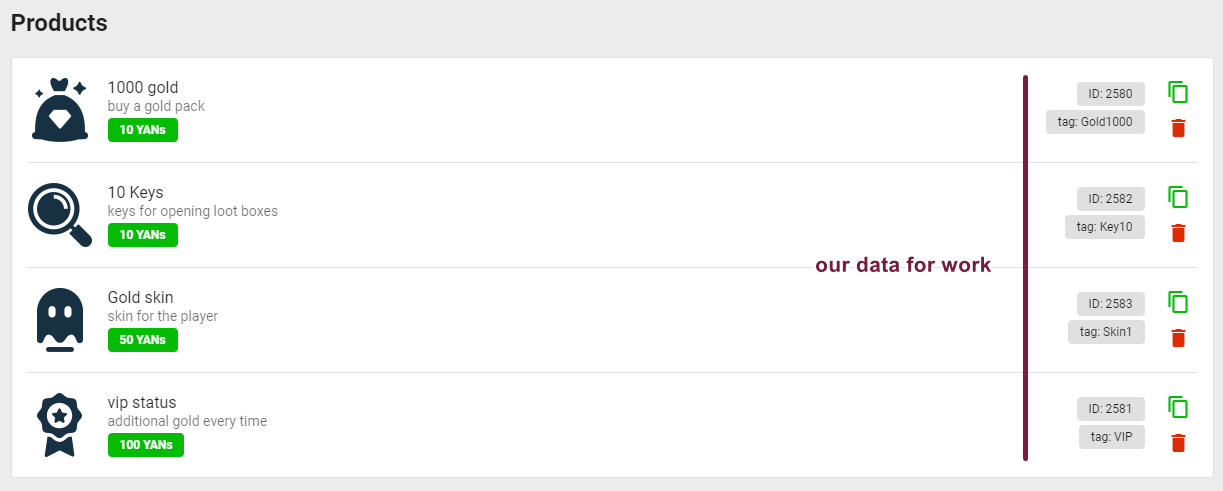
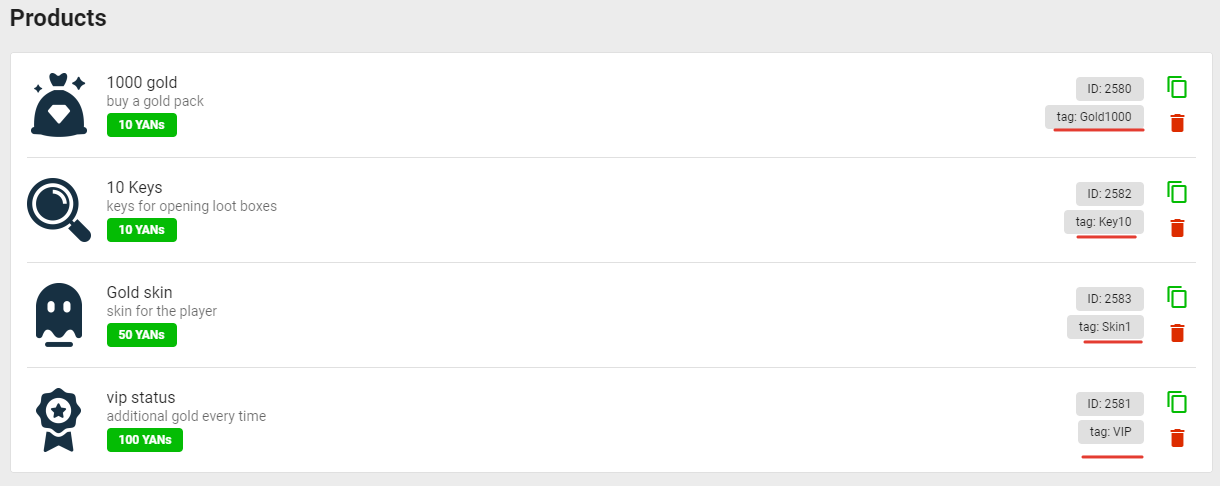
Let's assume the game plans to implement the following purchases:
- A thousand coins (one-time purchase)
- Ten keys (one-time purchase)
- VIP status (permanent purchase)
- Player skin (permanent purchase)
In the personal account, go to the products section and click the "Add" button (products -> add products).
Let's look at the default interface for adding a purchase:
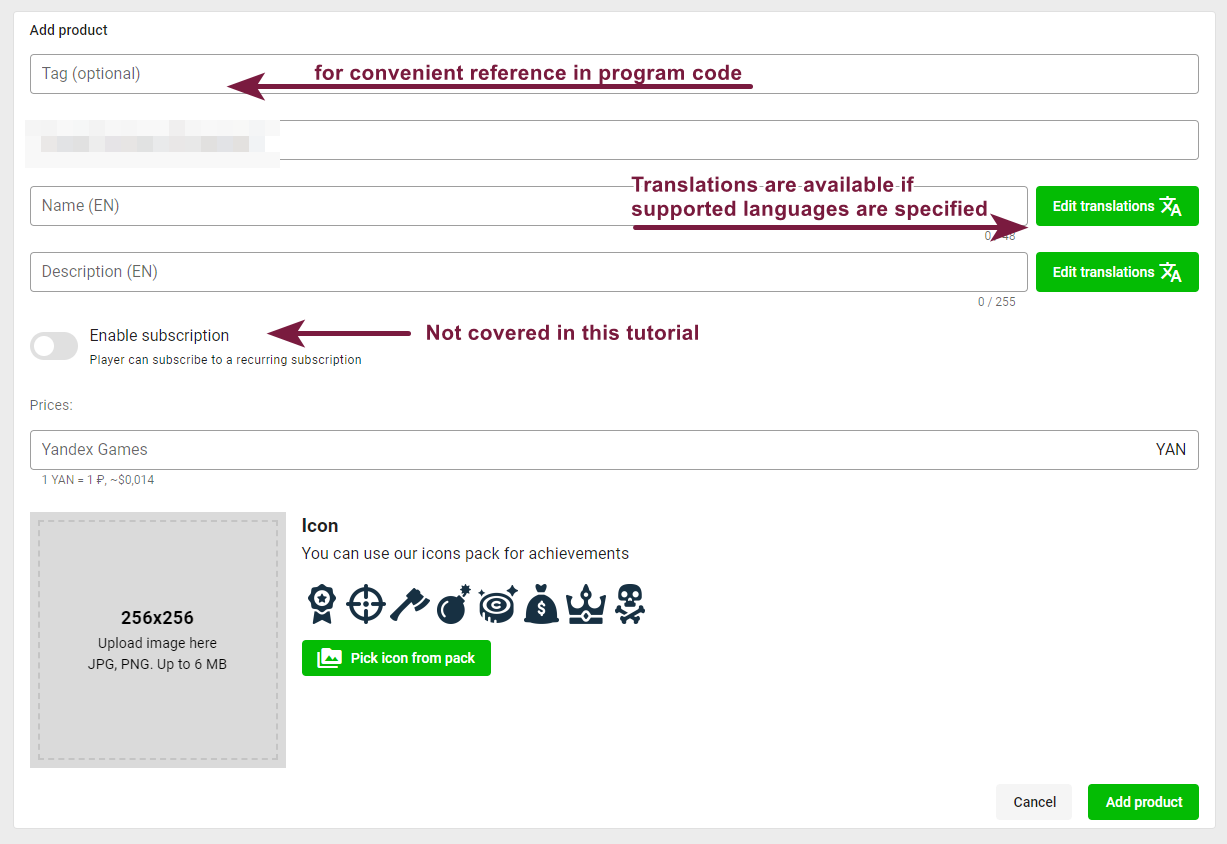
The number of fields can increase depending on the chosen platforms.
To add a purchase, we specify:
- Tag for reference in the program
- Displayed name
- Displayed description
- Additional information depending on the platform (see next screenshot)
- Icon
If any translation language is not available, check that you have indicated this language as supported in the project settings.
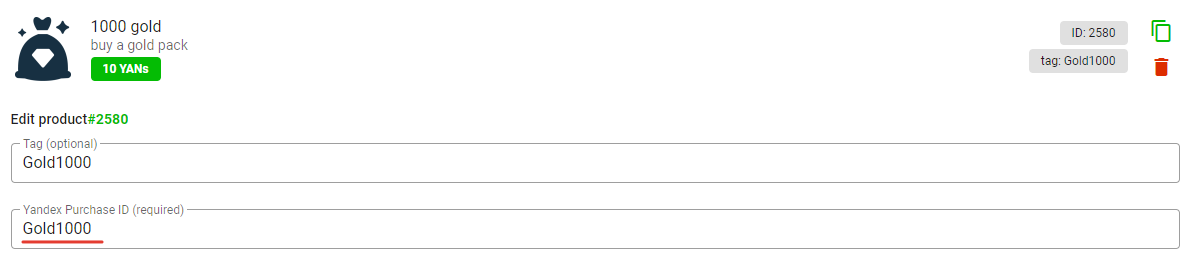
If you have already added platforms, additional fields will appear (if necessary). For example, the purchase ID on Yandex. You first create the information here and then copy it to Yandex. We'll return to this when we add platforms.
Example of filling out:
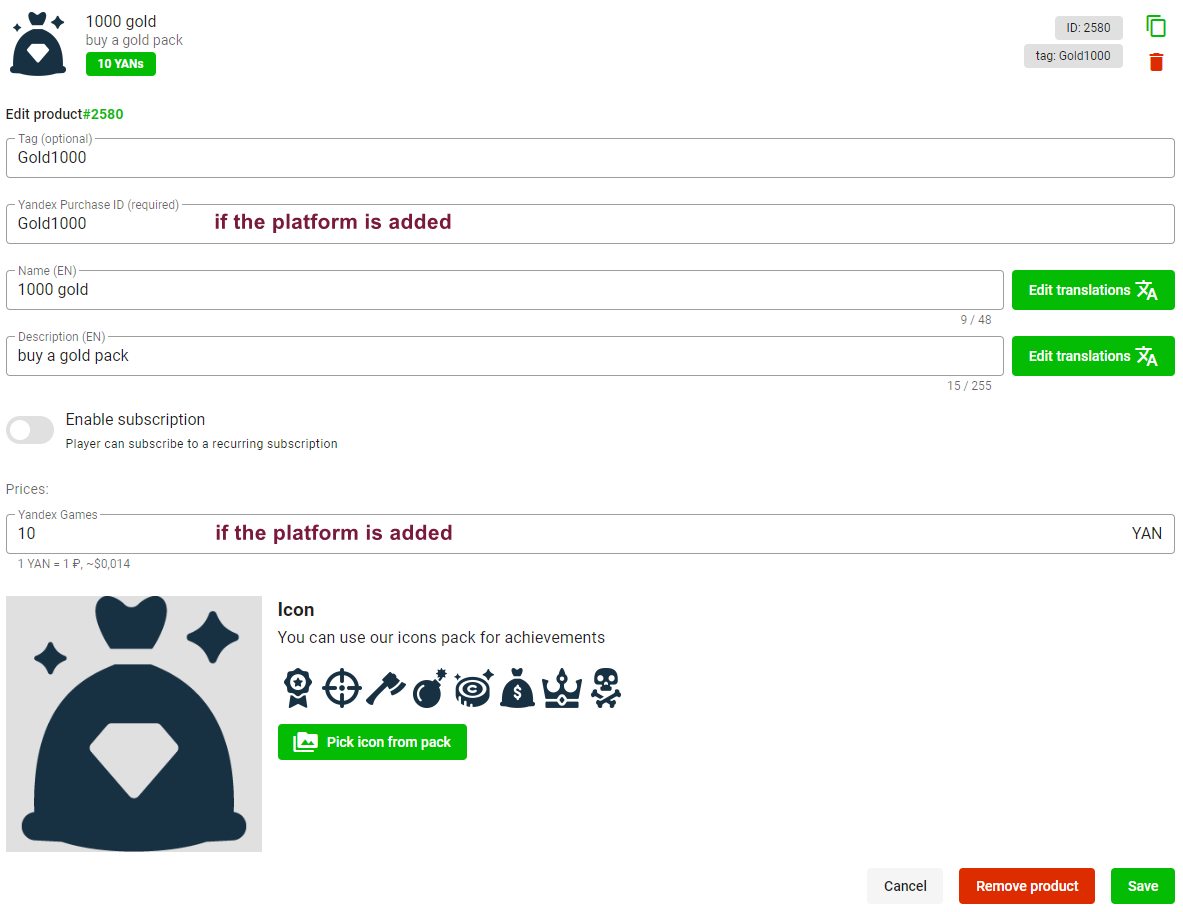
After filling out the information about the purchases, click "Add" (the subscription system will be covered in a separate tutorial).
Fill out all our planned purchases (you can add those that are not yet implemented or are only planned for the future).
Example of filling out:
Adding to Platforms
First, add platforms to GamePush (if you haven't done so already).
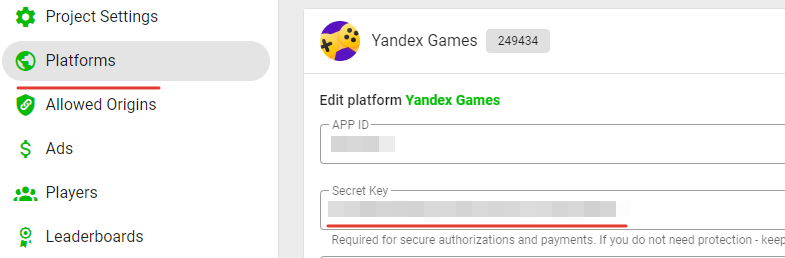
Yandex
Add any purchase with the ID indicated from the GamePush personal account. The example shows what parameters need to be identical.

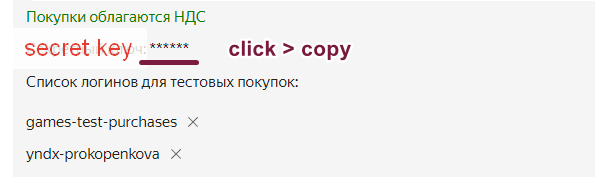
Copy the secret key from the Yandex developer console to the GamePush console.
Other Platforms
For current information on filling out details on the platform side, refer to the payments documentation in the section "Platform Setup".
Purchase Implementation
We have completed the preparatory stage, and now we can proceed to the implementation on the game's side. First of all, we will handle the purchase event.
Let's consider a template for working with purchases (download).
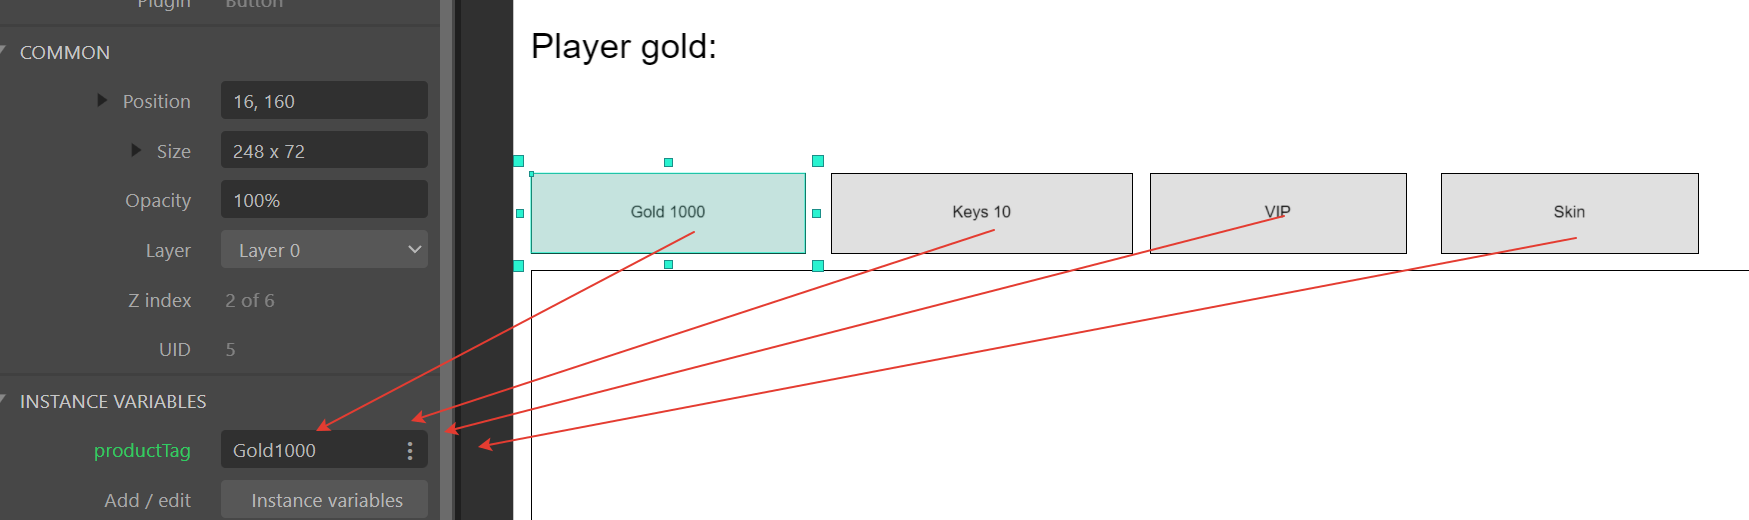
We have several identical buttons that the player can use to make a purchase. Each button has a variable with its own tag value (which we connected earlier):
Asynchronous Method
Let's look at the following code for a consumable purchase:
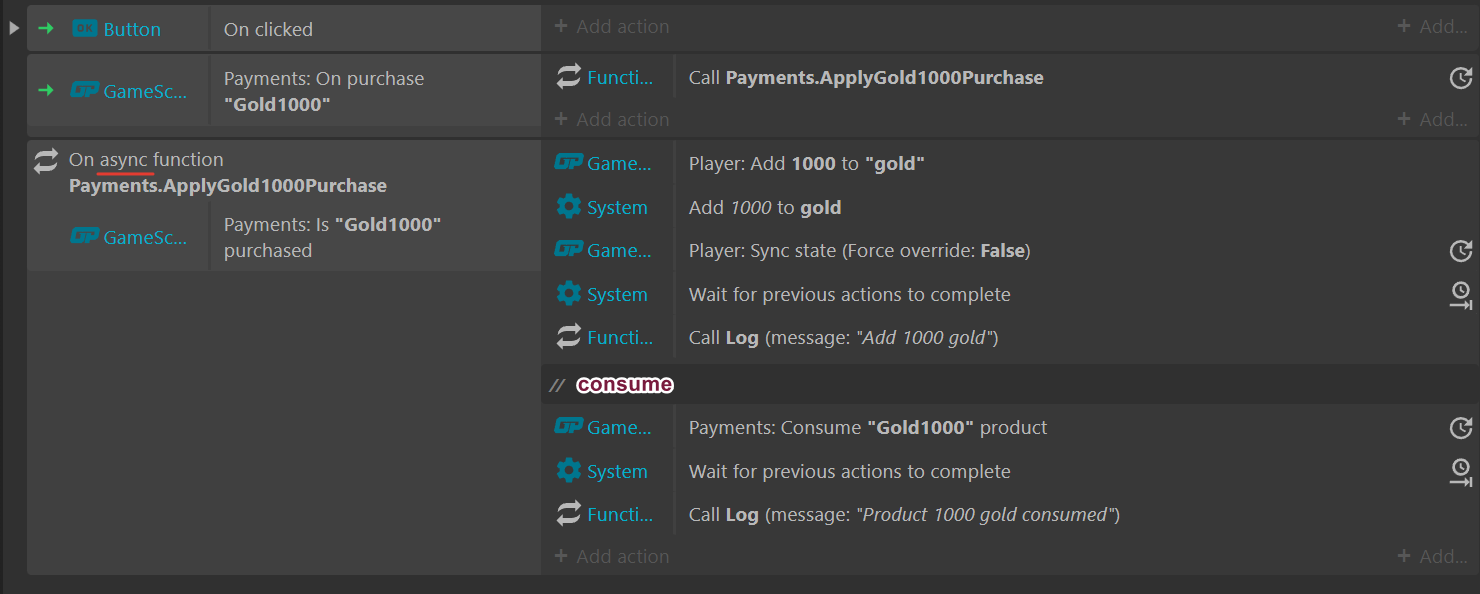
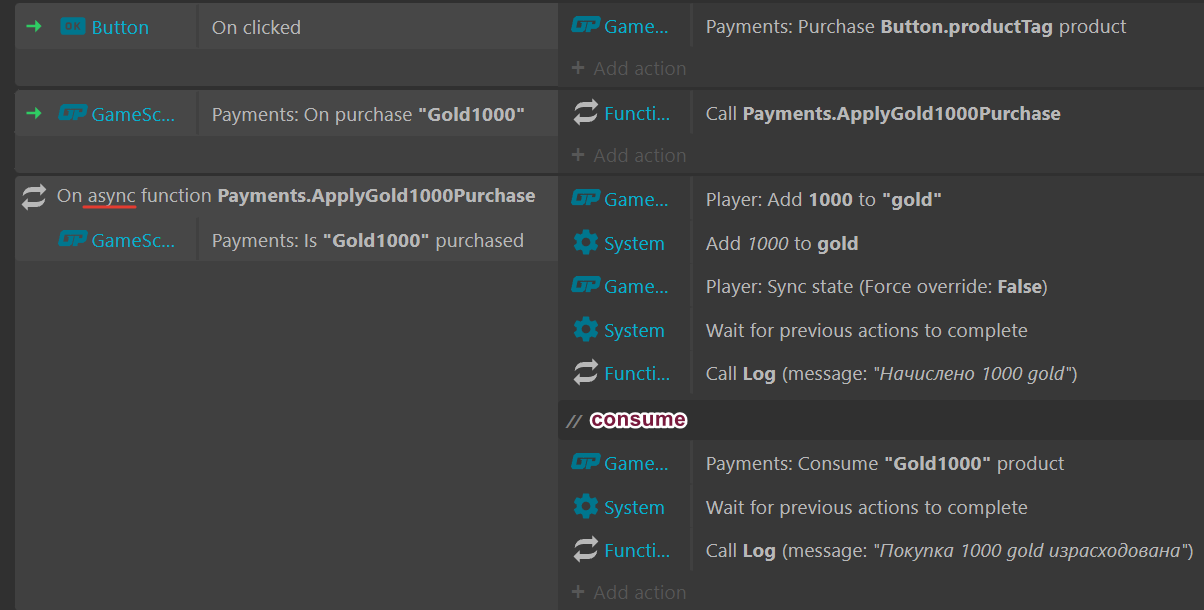
When the player clicks on a button, we send a request for a purchase using the tag specified in the button's variable.
When a successful purchase occurs, we start an asynchronous function that processes the purchase. We update the variables, synchronize and wait for completion. Then we spend the purchase because it is consumable.
The key credit function is similar.

Next, let's look at the following code for a permanent purchase:
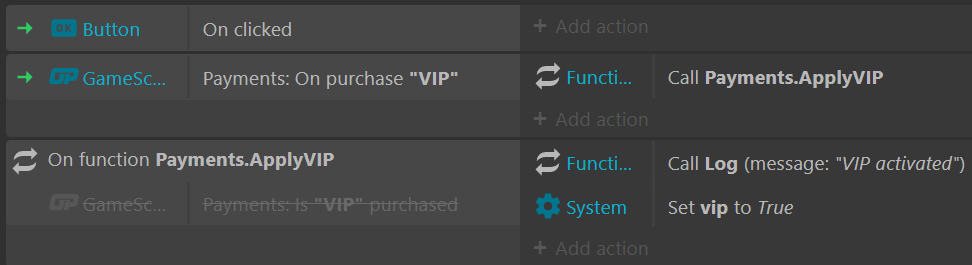
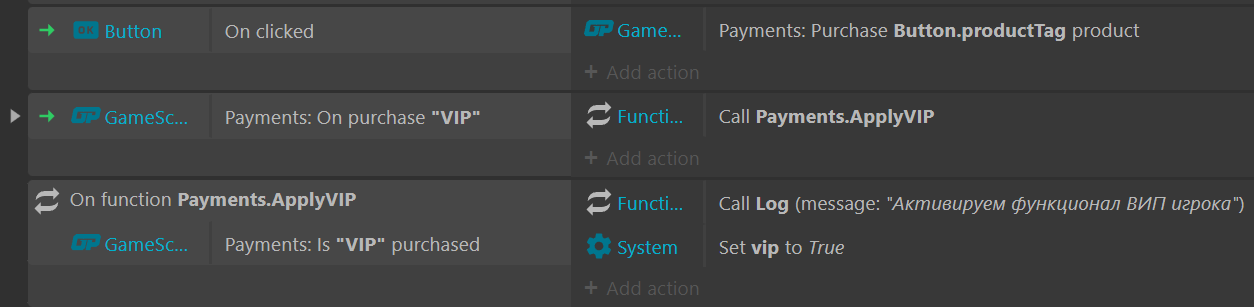
You can notice that there is less code.
We also activate the purchase when the button is clicked. If the purchase was successful, then we only activate the VIP functionality within the game.
Additional cloud variables are not required, as we will check for the presence of the purchase at startup.
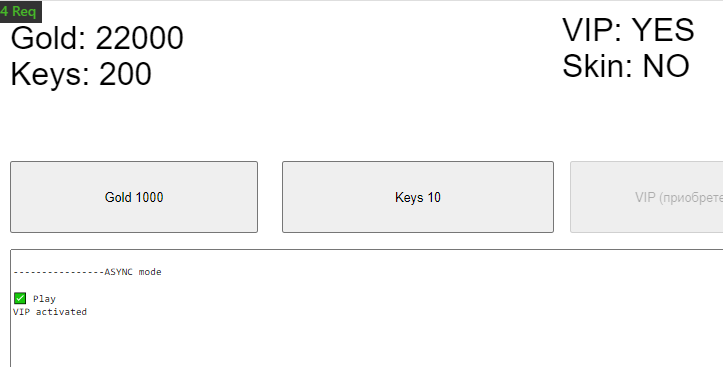
Below is an example of the result. The skin activation function is analogous.
Synchronous Method
Instead of handling an event, all actions will occur upon pressing the purchase button. Let's consider it with the following code example:
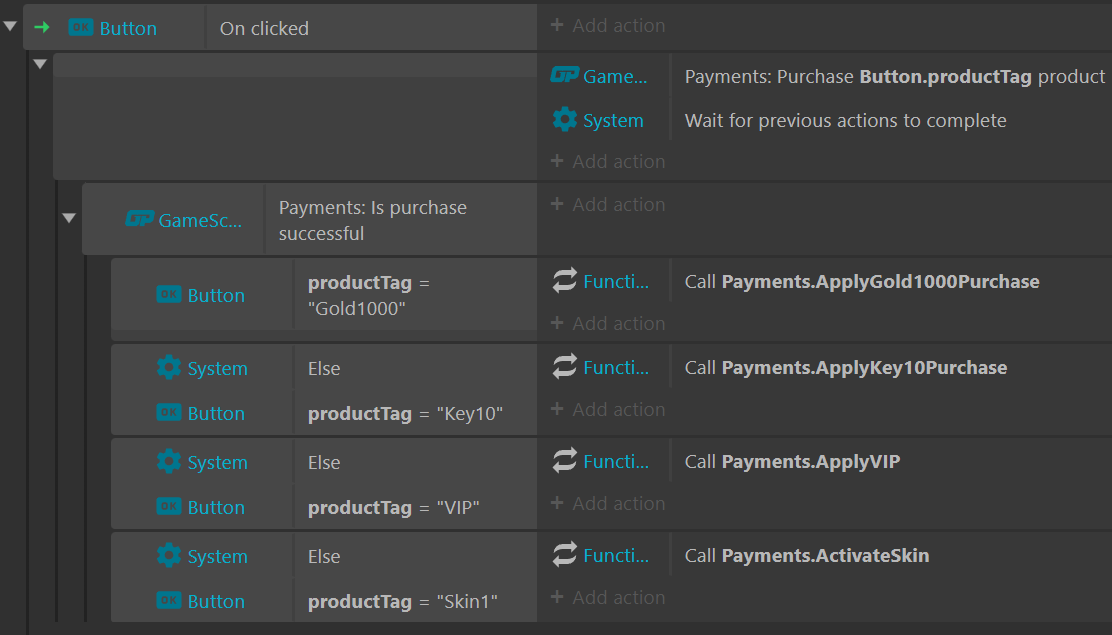
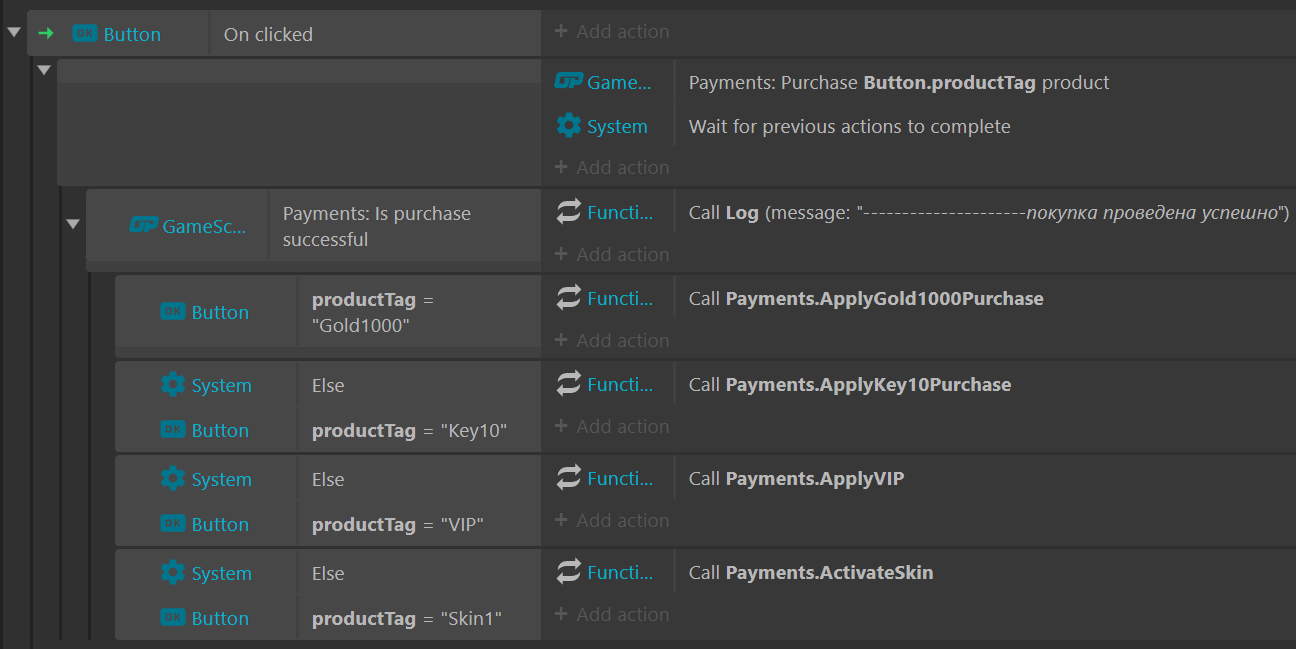
During the button press, we also initiate the purchase process, but this time we wait for its completion. If the purchase was successful, then we check the tag and launch the corresponding activation function from the previous implementation.
Purchase Verification
At the start of the game, it is important to carry out the following procedures:
- Consume not consumed purchases
- Check for permanent purchases
Synchronous Variant
Let's first consider the following startup actions:
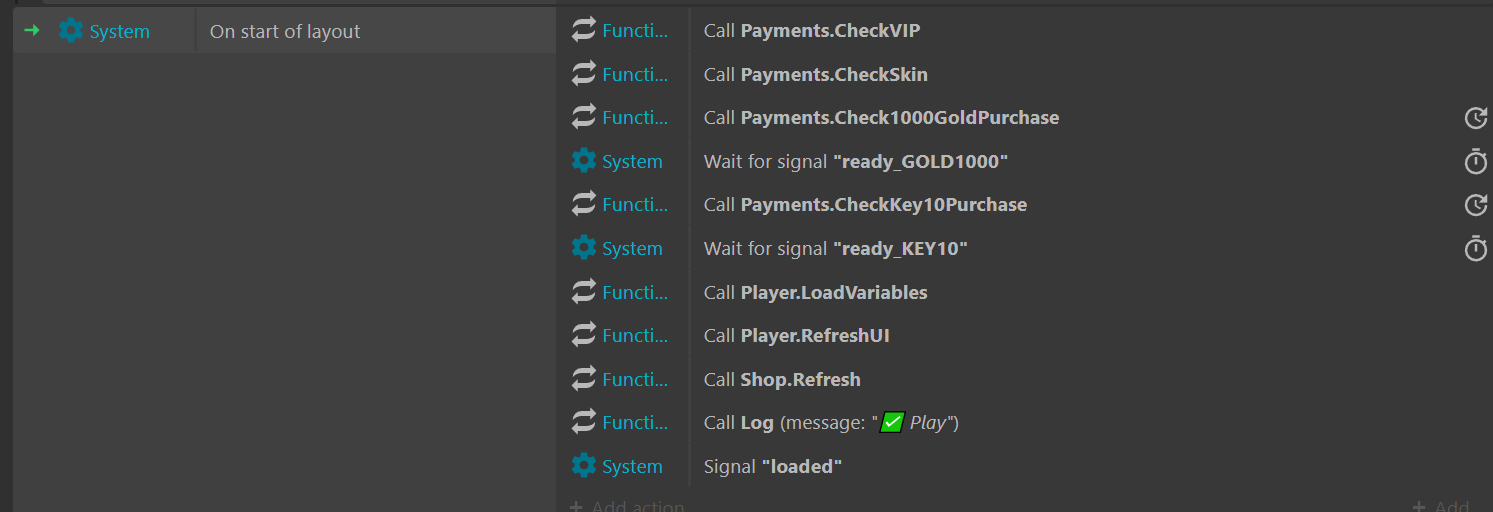
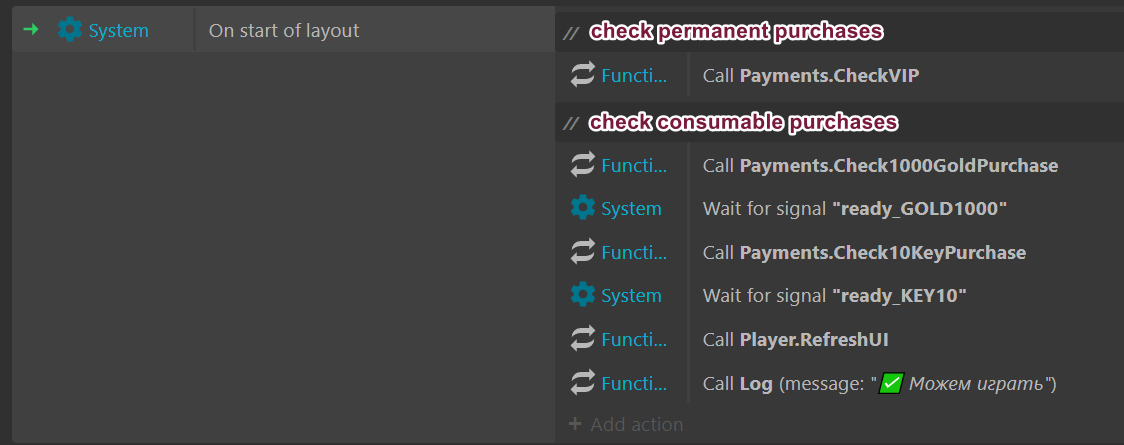
First, permanent purchases are checked, followed by checking consumable purchases (asynchronous functions) and after each we wait for a signal that all purchases have been credited to the player. This is done for each consumable purchase.
We update the interface and can play the game.
Let's look at the functions in a bit more detail:
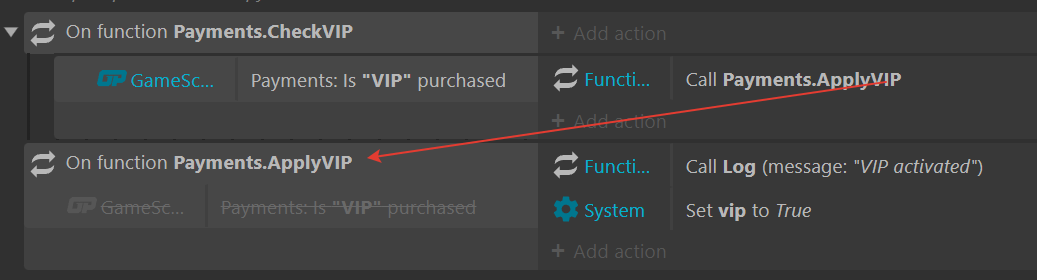
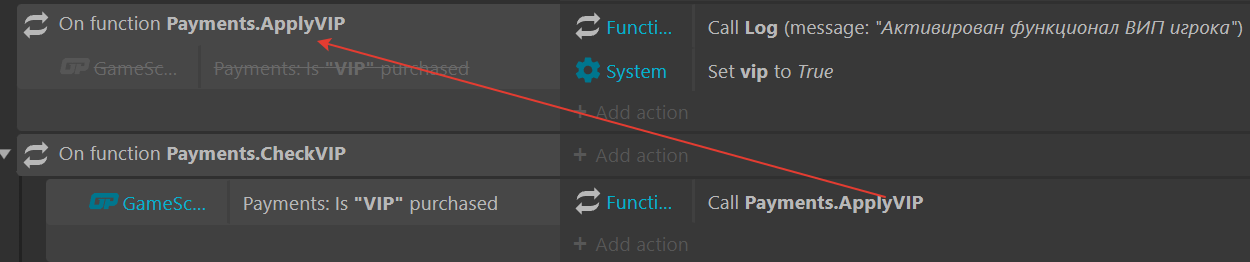
We check if the purchase has been made and initiate activation of the functionality. The activation function is the same as during the purchase process.
Simple Variant
Let's consider crediting consumable purchases.
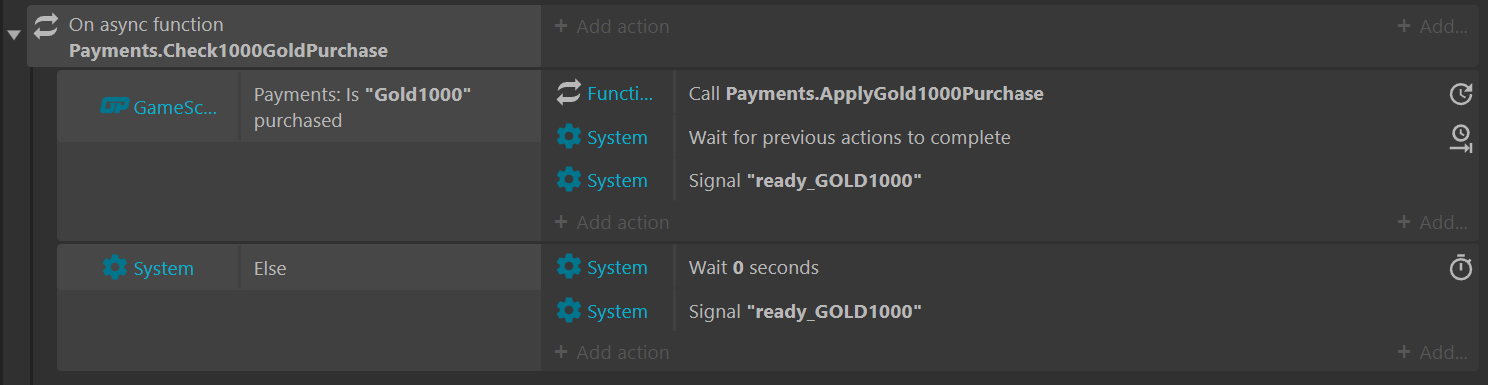
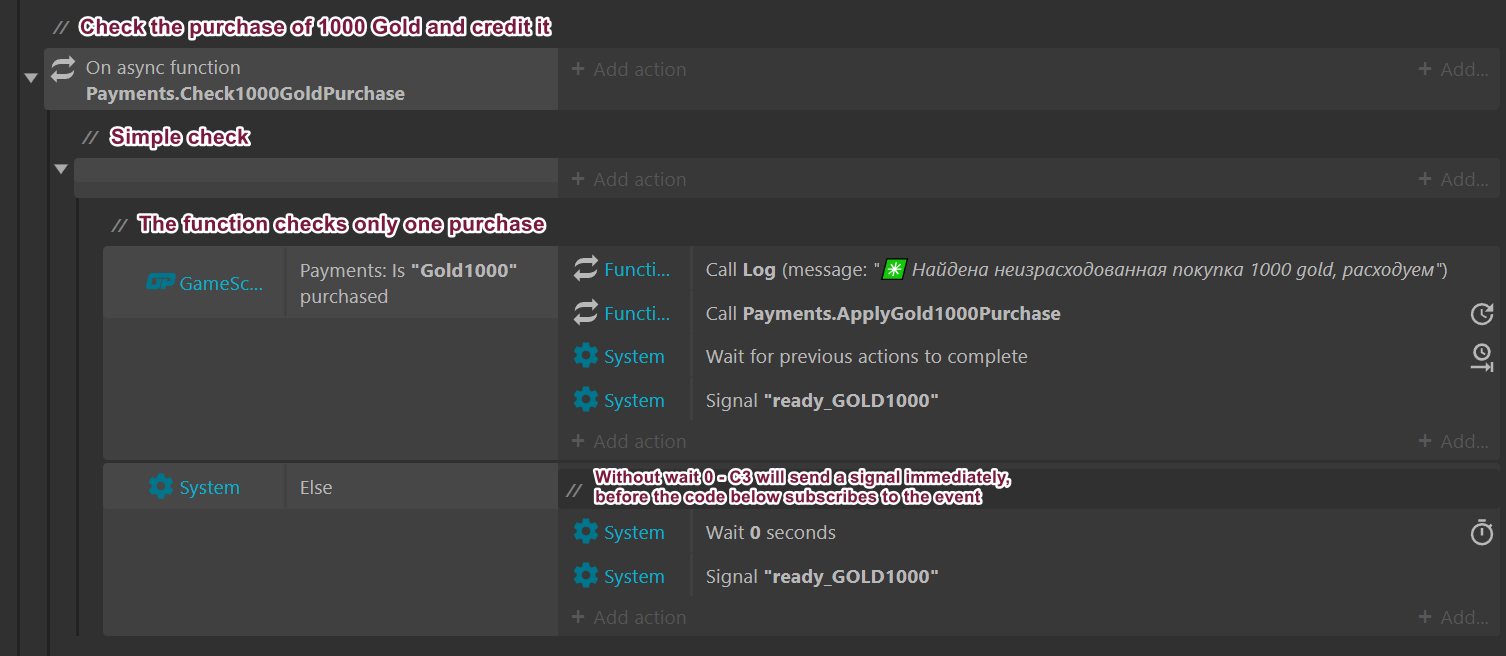
If we have a consumable purchase available, we credit it, wait, and then report completion. Otherwise, we only report completion.
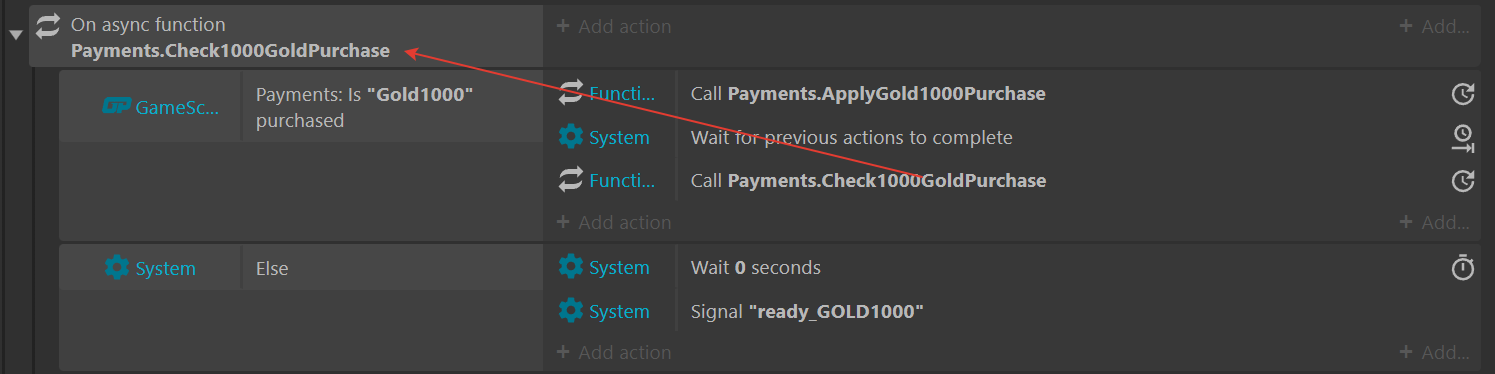
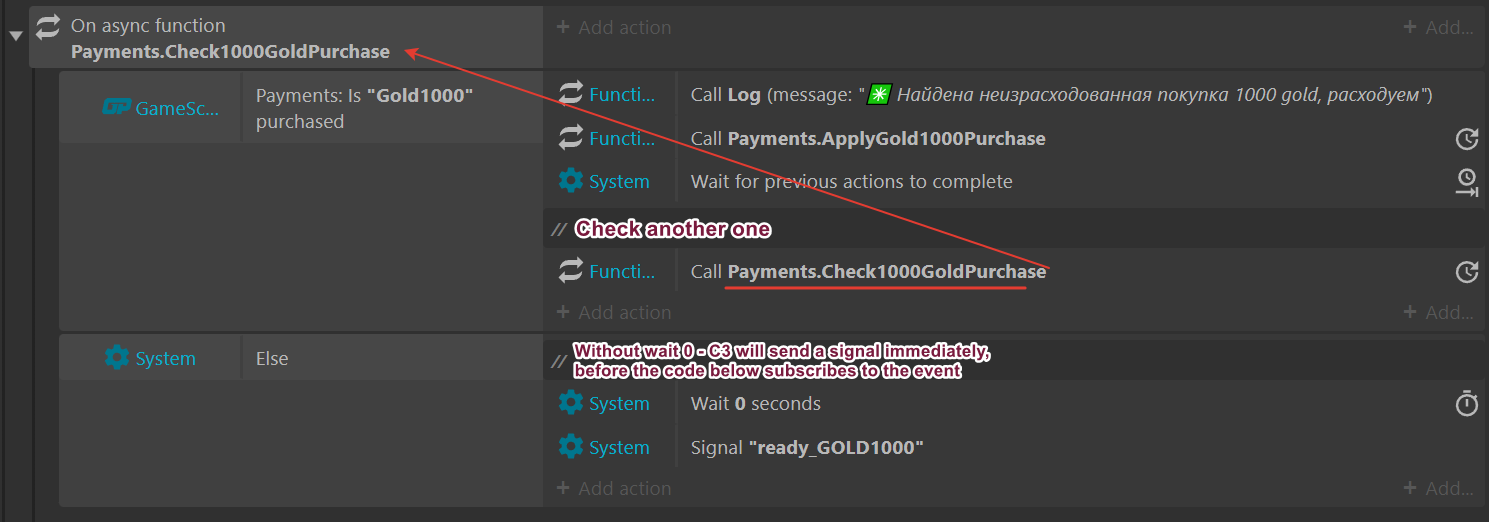
Advanced Variant
The next option is different in that after crediting bonuses we launch the same function again. The process occurs cyclically until the condition for the presence of a purchase is false.
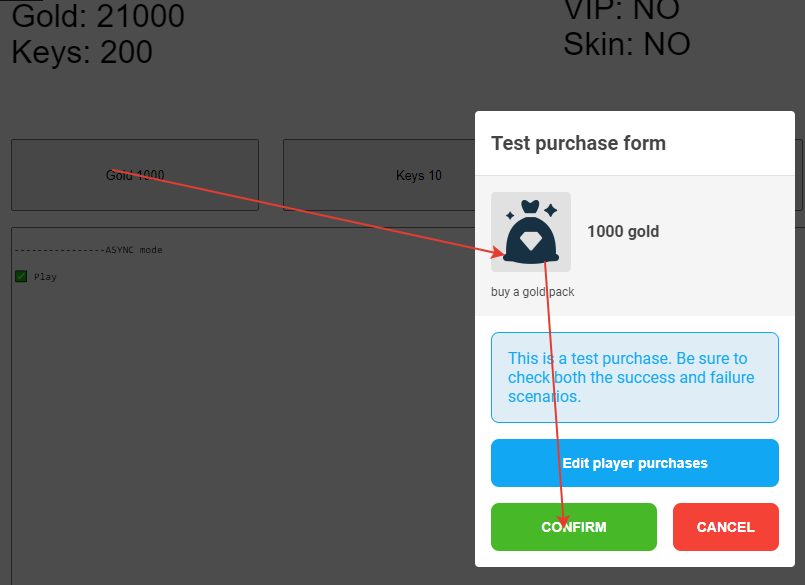
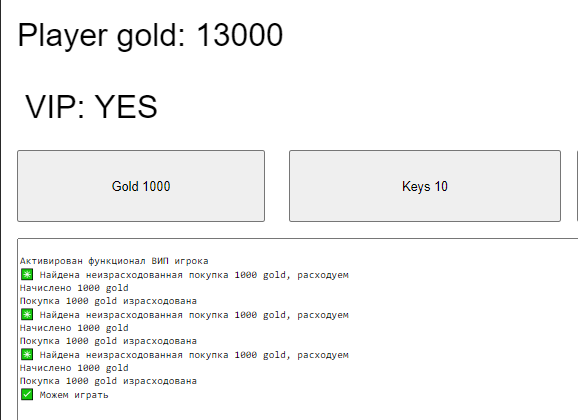
Testing Credits
In the player's console, you can assign (to yourself) several consumable purchases and start the game.

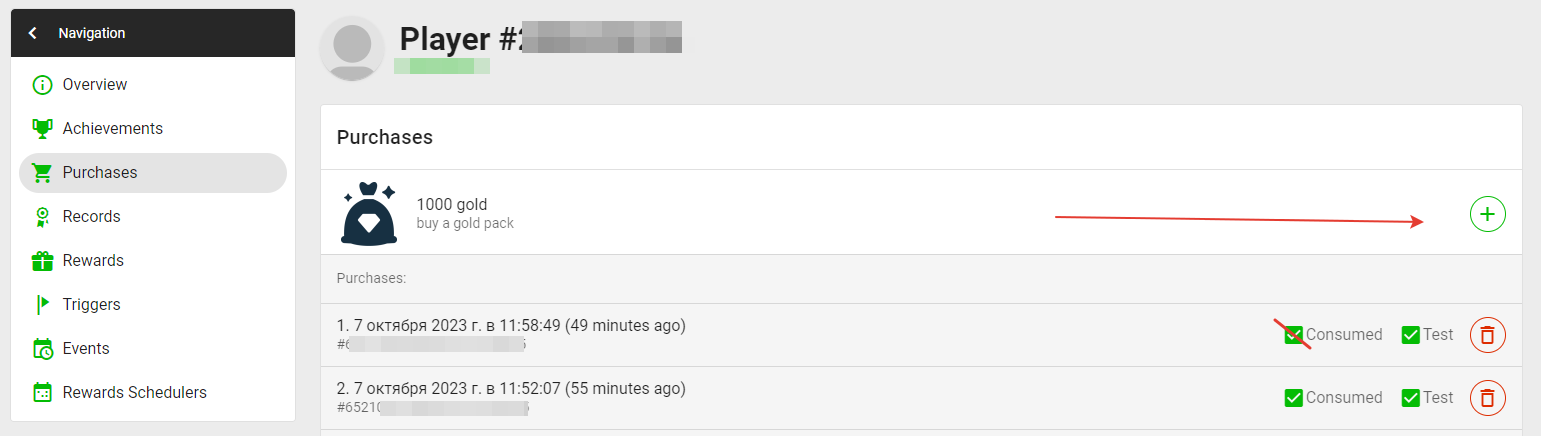
After starting, you should have the following:
Additional Information
In the source code, you can look at both implementations, as well as additional functionality:
- Interface updates
- Shop updates
- Purchasing mode switching
Author: @aventy
Stay in Touch
Other documents of this chapter available Here. To get started, welcome to the Tutorials chapter.
GamePush Community Telegram: @gs_community.
For your suggestions e-mail: official@gamepush.com
We Wish you Success!