Yandex ID
A service for instant authorization with an audience of over 100 million.
Yandex ID Settings
To get started, register at Yandex OAuth and create a project.
In the Application Platforms section, mark Web Services and specify the redirect URL and project hosts.
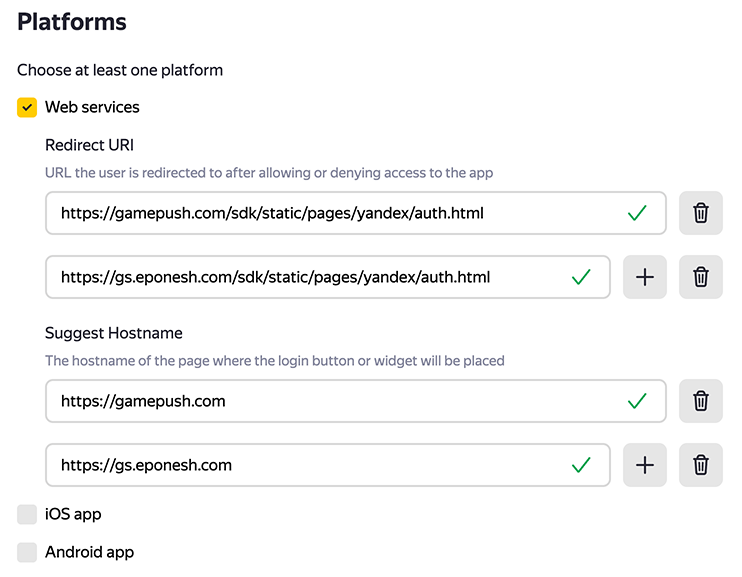
- In the Redirect URL section, specify:
https://gamepush.com/sdk/static/pages/yandex/auth.htmlhttps://gs.eponesh.com/sdk/static/pages/yandex/auth.html
- In the Page Host section, specify:
https://gamepush.comhttps://gs.eponesh.com
Copy the application's Client ID and Client Secret to paste into the service:

GamePush Settings
In the project control panel under the Players section, in Custom Authorization Configurations, add a new configuration.
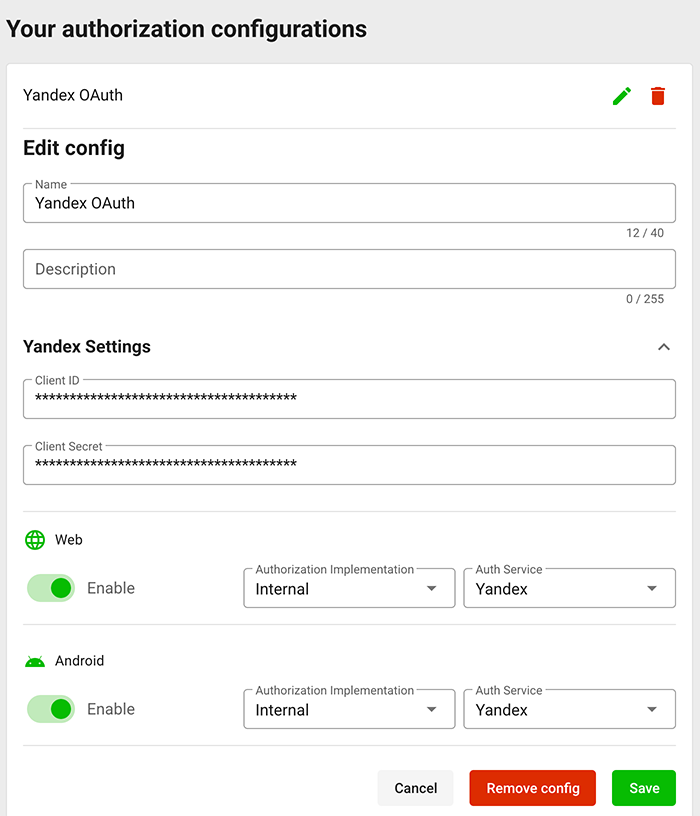
- Name. Any name you choose.
- Description. For your clarification.
- Yandex Settings (first select Yandex as the authorization service)
- Client ID. Enter the Client ID from the authorization application.
- Client Secret. Enter the Client Secret from the authorization application.
- Web. Select Yandex as the authorization service to enable sign-in on your websites.
- Android. Select Yandex as the authorization service to enable sign-in in the Android mobile app.
Integration into the Game
To start using Yandex ID for authorization, select the desired platform (website or app store) and specify the authorization configuration using Yandex ID.

In the game, everything will start working automatically after saving the platform settings.
When building an Android app via Cordova, add the "In-App Browser" plugin (cordova-plugin-inappbrowser)
Add Authorization Methods (SDK) to your game.
Stay in Touch
Other documents of this chapter available Here. To get started, welcome to the Tutorials chapter.
GamePush Community Telegram: @gs_community.
For your suggestions e-mail: official@gamepush.com
We Wish you Success!