Connecting GamePush to a game with your own backend
Who this guide is for
You already have a game client and your own backend. You store progress, balance, and entitlements yourself. You need GamePush to reach platforms: auth, payments, ads, and platform events — without replacing your server.
| Component | Responsibility |
|---|---|
| Game client | Calls the GamePush SDK: profile, login, purchases, ads, ready / pause / sound |
| GamePush | Platforms, payments, player signature, webhooks |
| Your server | Session, progress, signature verification, granting purchases |
1. Add the game in GamePush
- Sign in to the panel and add a game.
- Open Public Zone.
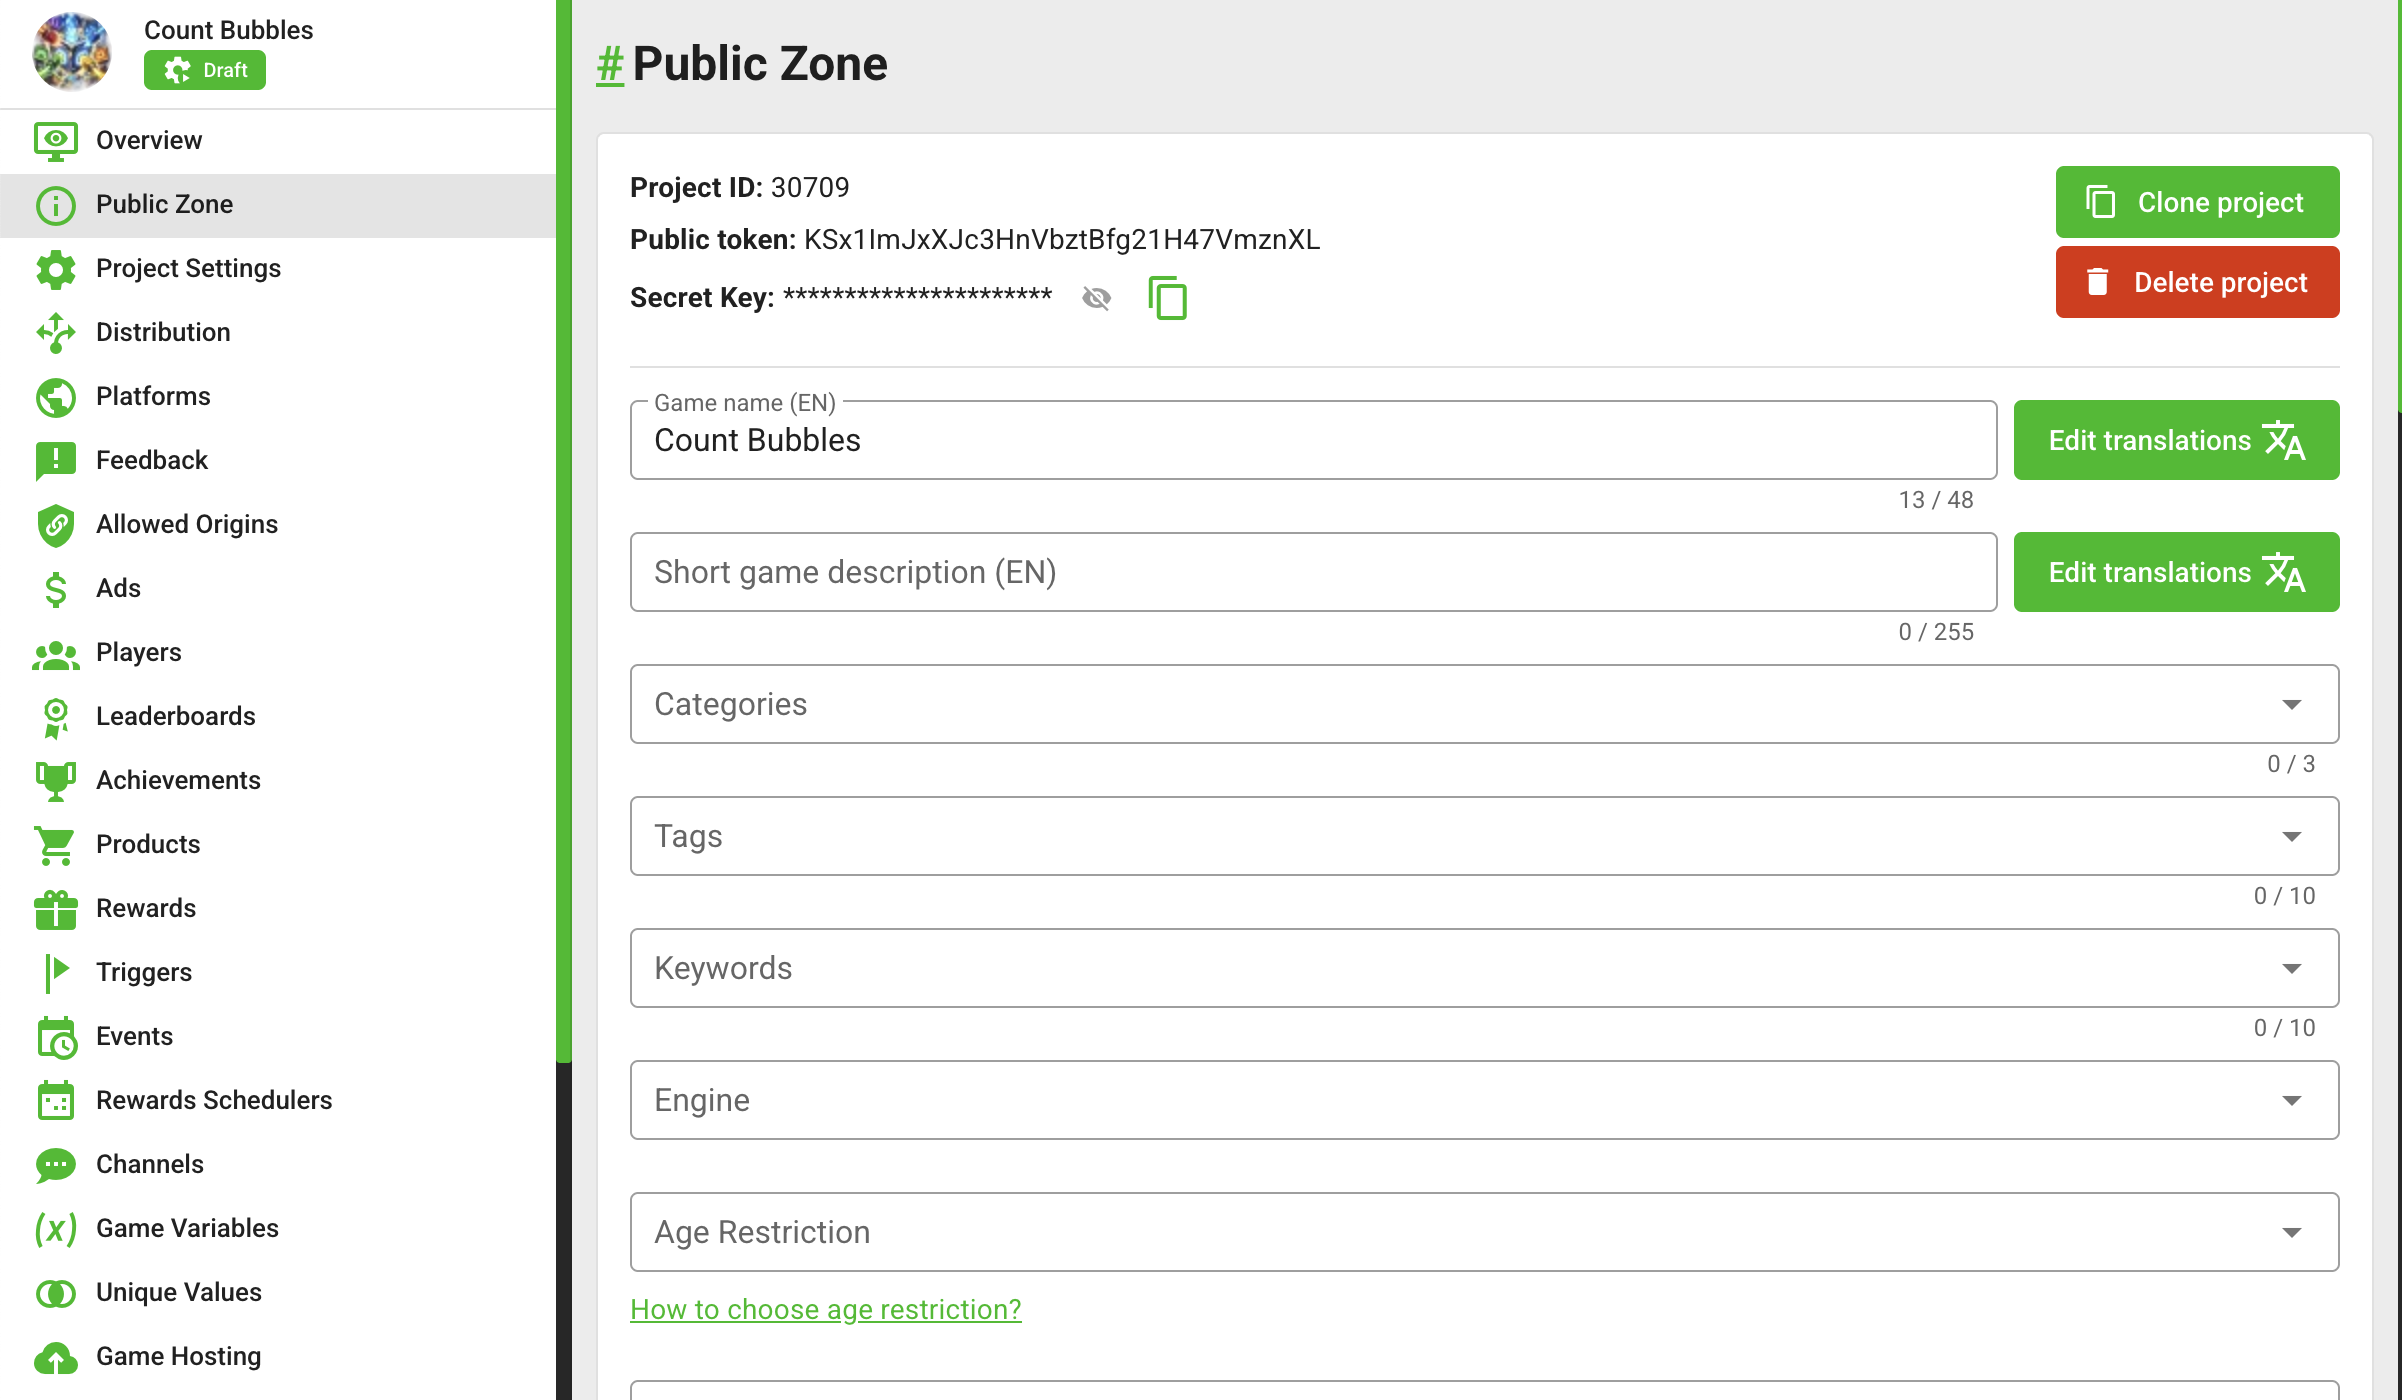
You need three values:
| Value | Where it is used |
|---|---|
Project ID (projectId) | Client: SDK load |
Public key (publicToken) | Client: SDK load |
| Secret key | Server only: verify player and payment signatures |
Create the secret key if it does not exist.
Keep the secret key on the server only. Do not put it in the game code, send it to the browser, or publish it in a repository or screenshot. Anyone who obtains this key can forge player data and payment notifications.
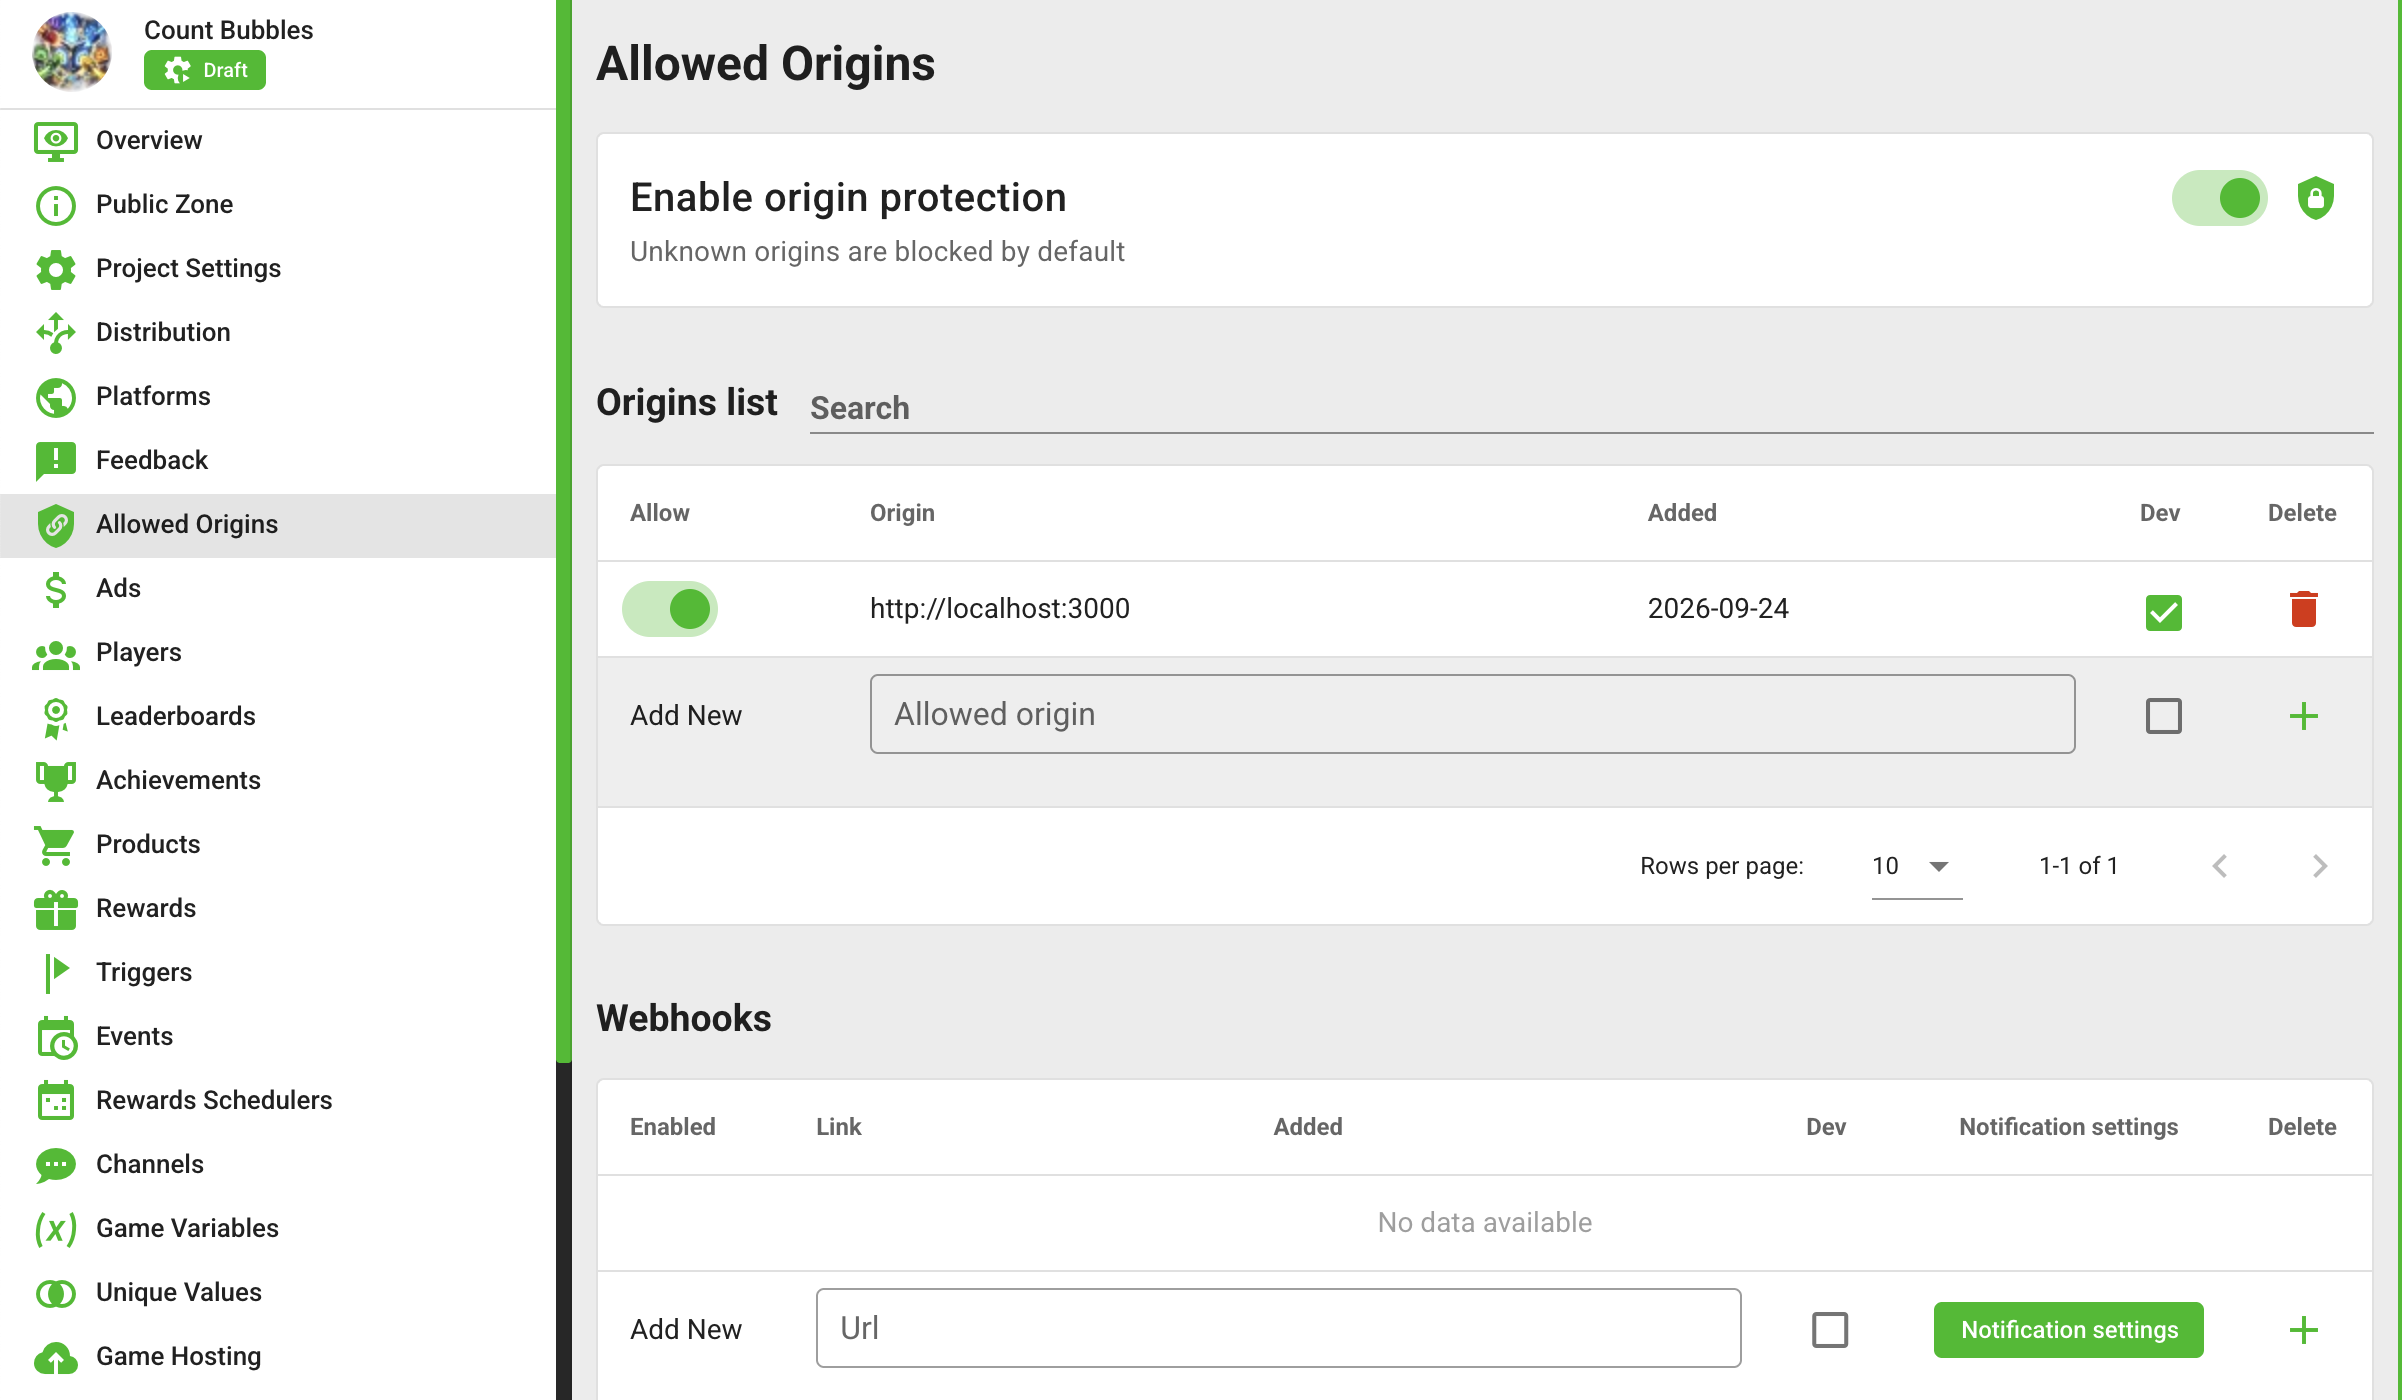
- Open Allowed Sites, add your origins (for example
http://localhost:3000and your staging URL). For local and staging checks, enable Test on those origins.
2. Connect the SDK
To get the ready-made script for embedding the GamePush SDK, use the Adding a Game section and put in your projectId and publicToken.
window.onGPInit = async (gp) => {
    await gp.player.ready;
    // SDK and player profile are available
};
After onGPInit, wait for gp.player.ready before reading the profile or starting platform flows.
3. iframe and page reload
On platforms the game almost always runs inside an iframe: the outer page belongs to the platform, your game runs inside.
The SDK expects the game document in that frame to live for the whole session. If you fully reload the page inside the frame (location.reload(), a link back to the “same” game, a “Restart” button that refreshes the page), the game code and in-flight SDK calls are torn down. The script may load again, but the platform is still tied to the previous launch and often will not bring the SDK up again in the same frame. After that, ads, purchases, and other methods may stop responding until the player closes the game and opens it again from the platform.
So:
- switch screens, levels, and “play again” by changing state in the already loaded page — no reload;
- do not destroy and recreate the game
iframewhen the player only moves through an outer menu (on the platform page or in your shell).
If you must reload the frame, restart the game fully through the platform instead of just refreshing the page inside the iframe.
4. Authorize the player and verify the signature
When the SDK is ready, the client has a GamePush profile. You can show it in the UI, but do not trust a player id from the client alone — it is easy to forge. So the client sends gp.player.authToken, and your backend verifies the signature to know which GamePush player is calling you.
Client
Wait for gp.player.ready. Then profile fields are available (gp.player.id, gp.player.isLoggedIn, and others) — full list in Player manager.
If the player needs to sign in through the platform or sign out:
await gp.player.login();
await gp.player.logout();
When calling your own API, send gp.player.authToken to the server (and optionally gp.player.id only as an extra check).
What gp.player.authToken is
It is a JWT. GamePush signs it with the project secret key using HS256. The token appears after the player is ready or synchronized.
If the secret key was not created in the panel, the string is empty — create the key in Public Zone first.
Claims inside the token include:
| Field | Meaning |
|---|---|
sub | GamePush player ID. Trust it only after signature verification succeeds |
credentials | This player's identifier on the platform |
exp | Lifetime — 15 minutes |
More detail: Authorization token for your own backend.
Server
On the backend:
- Verify the JWT with the project secret key.
- Take the player id from
sub. - If the client also sent
playerIdin the request body, compare it withsub. If they differ, reject the request. - Then continue as you normally do: open your session or bind the player to your account. It is usually better to exchange
authTokenonce for your session instead of sending the GamePush JWT on every request — it only lives for 15 minutes.
Verification example:
import jwt from 'jsonwebtoken';

const payload = jwt.verify(authToken, projectSecret, { algorithms: ['HS256'] });
const playerId = Number(payload.sub);
// then create your session for playerId
$decoded = JWT::decode($authToken, new Key($projectSecret, 'HS256'));
$playerId = (int) $decoded->sub;
Do not accept a client-sent playerId without a verified authToken. The public key (publicToken) cannot verify this signature — only the project secret key on the server.
5. Player ID changes on your side
A guest in GamePush also has a player.id. The client profile can change not only after your “Log in” / “Log out” buttons: the player signs in on the platform, switches accounts, or signs out. After that the ID (and authToken) are different — do not keep using the old server session.
On the client it is better to listen to profile events, not only to the result of login() / logout():
gp.player.on('sync', onPlayerUpdated);
gp.player.on('load', onPlayerUpdated);
gp.player.on('logout', () => {
    // the profile is still updating — stop requests that use the old session for now
});

async function onPlayerUpdated(success) {
    if (!success) return;
    // send authToken to your server again and open a session for the new ID
}
After login or logout, call gp.player.load() so you get a fresh profile and JWT. Not every platform supports logout through the SDK — check gp.platform.isLogoutAvailable before showing “Log out”. More on login and logout: Player manager.
On your backend:
| Situation | What happens in GamePush | What to do on your side |
|---|---|---|
| Guest signs in | player.id may change | Close the guest session. Open a session for the new ID (after verifying the new authToken). Whether to move guest progress into the account is your product decision; GamePush will not merge it for you |
| Logged-in player switches account | Different player.id | Stop serving the previous player's data. Bind requests to the new ID |
| Logged-in player signs out | Guest again (a different or previous guest profile) | Close the logged-in player's session. Wait for the new profile and authToken, then open a session for the current ID |
The client must stop sending the old session token as soon as the profile changes. If you also need to end the session on the server right away, add your own revoke request; otherwise the token stays valid until it expires.
6. Fill in the purchase list in GamePush
Purchases and subscriptions in the SDK only work with products that exist in your GamePush project — the Purchases section. Without that list you cannot start a payment or process fulfillment on your server.
Every product needs a stable tag — that is what you use from code (GOLD_1000, VIP, and so on). You can change the name and translations; avoid renaming the tag. For a subscription, also set the subscription flag and period — see Subscriptions.
How to fill the catalog
There are two options:
-
Manually — create products in Purchases: tag, name, description, price.
-
Import:
-
Open Purchases → Export to CSV/JSON and download the GamePush CSV template (or the current list if you are updating).
-
Fill in the rows: leave
idempty for new products; always settag, names, and prices (realPrices.*/ platform prices — follow the template columns). -
In the panel click Import from CSV, check the preview, and confirm the import.
-
In the game, after
gp.player.ready, make sure the SDK sees the products, for example:gp.payments.products.find((product) => product.tag === 'GOLD_1000');
-
Other options — Yandex Games import, arbitrary CSV, updating existing rows by id — are in Import and Export Purchases.
For a test run, products in the panel plus a test origin are enough. Before going live on a platform you often need that platform’s own product IDs and setup — see Payment setup on platforms.
7. Purchases and subscriptions
GamePush and the platform handle payment. Do not grant items on your server based only on a client request — that request is easy to forge. Trust a signed webhook that GamePush sends to your backend.
- The client opens payment through the SDK.
- GamePush sends a purchase webhook to your server.
- The server verifies the signature and grants once by
purchase._id. - The client learns from your API that fulfillment succeeded, then confirms delivery to GamePush with
consume.
Client
const result = await gp.payments.purchase({ tag: 'GOLD_1000' });
// result.purchase._id — id of this specific transaction
if (gp.payments.isSubscriptionsAvailable) {
    await gp.payments.subscribe({ tag: 'VIP' });
}
Methods and parameters: Payments and Subscriptions.
Webhook
- You need a server URL reachable from the internet. For local work use a tunnel or staging.
- In the panel open Allowed Sites → Webhooks and set the URL. For test players enable Test.
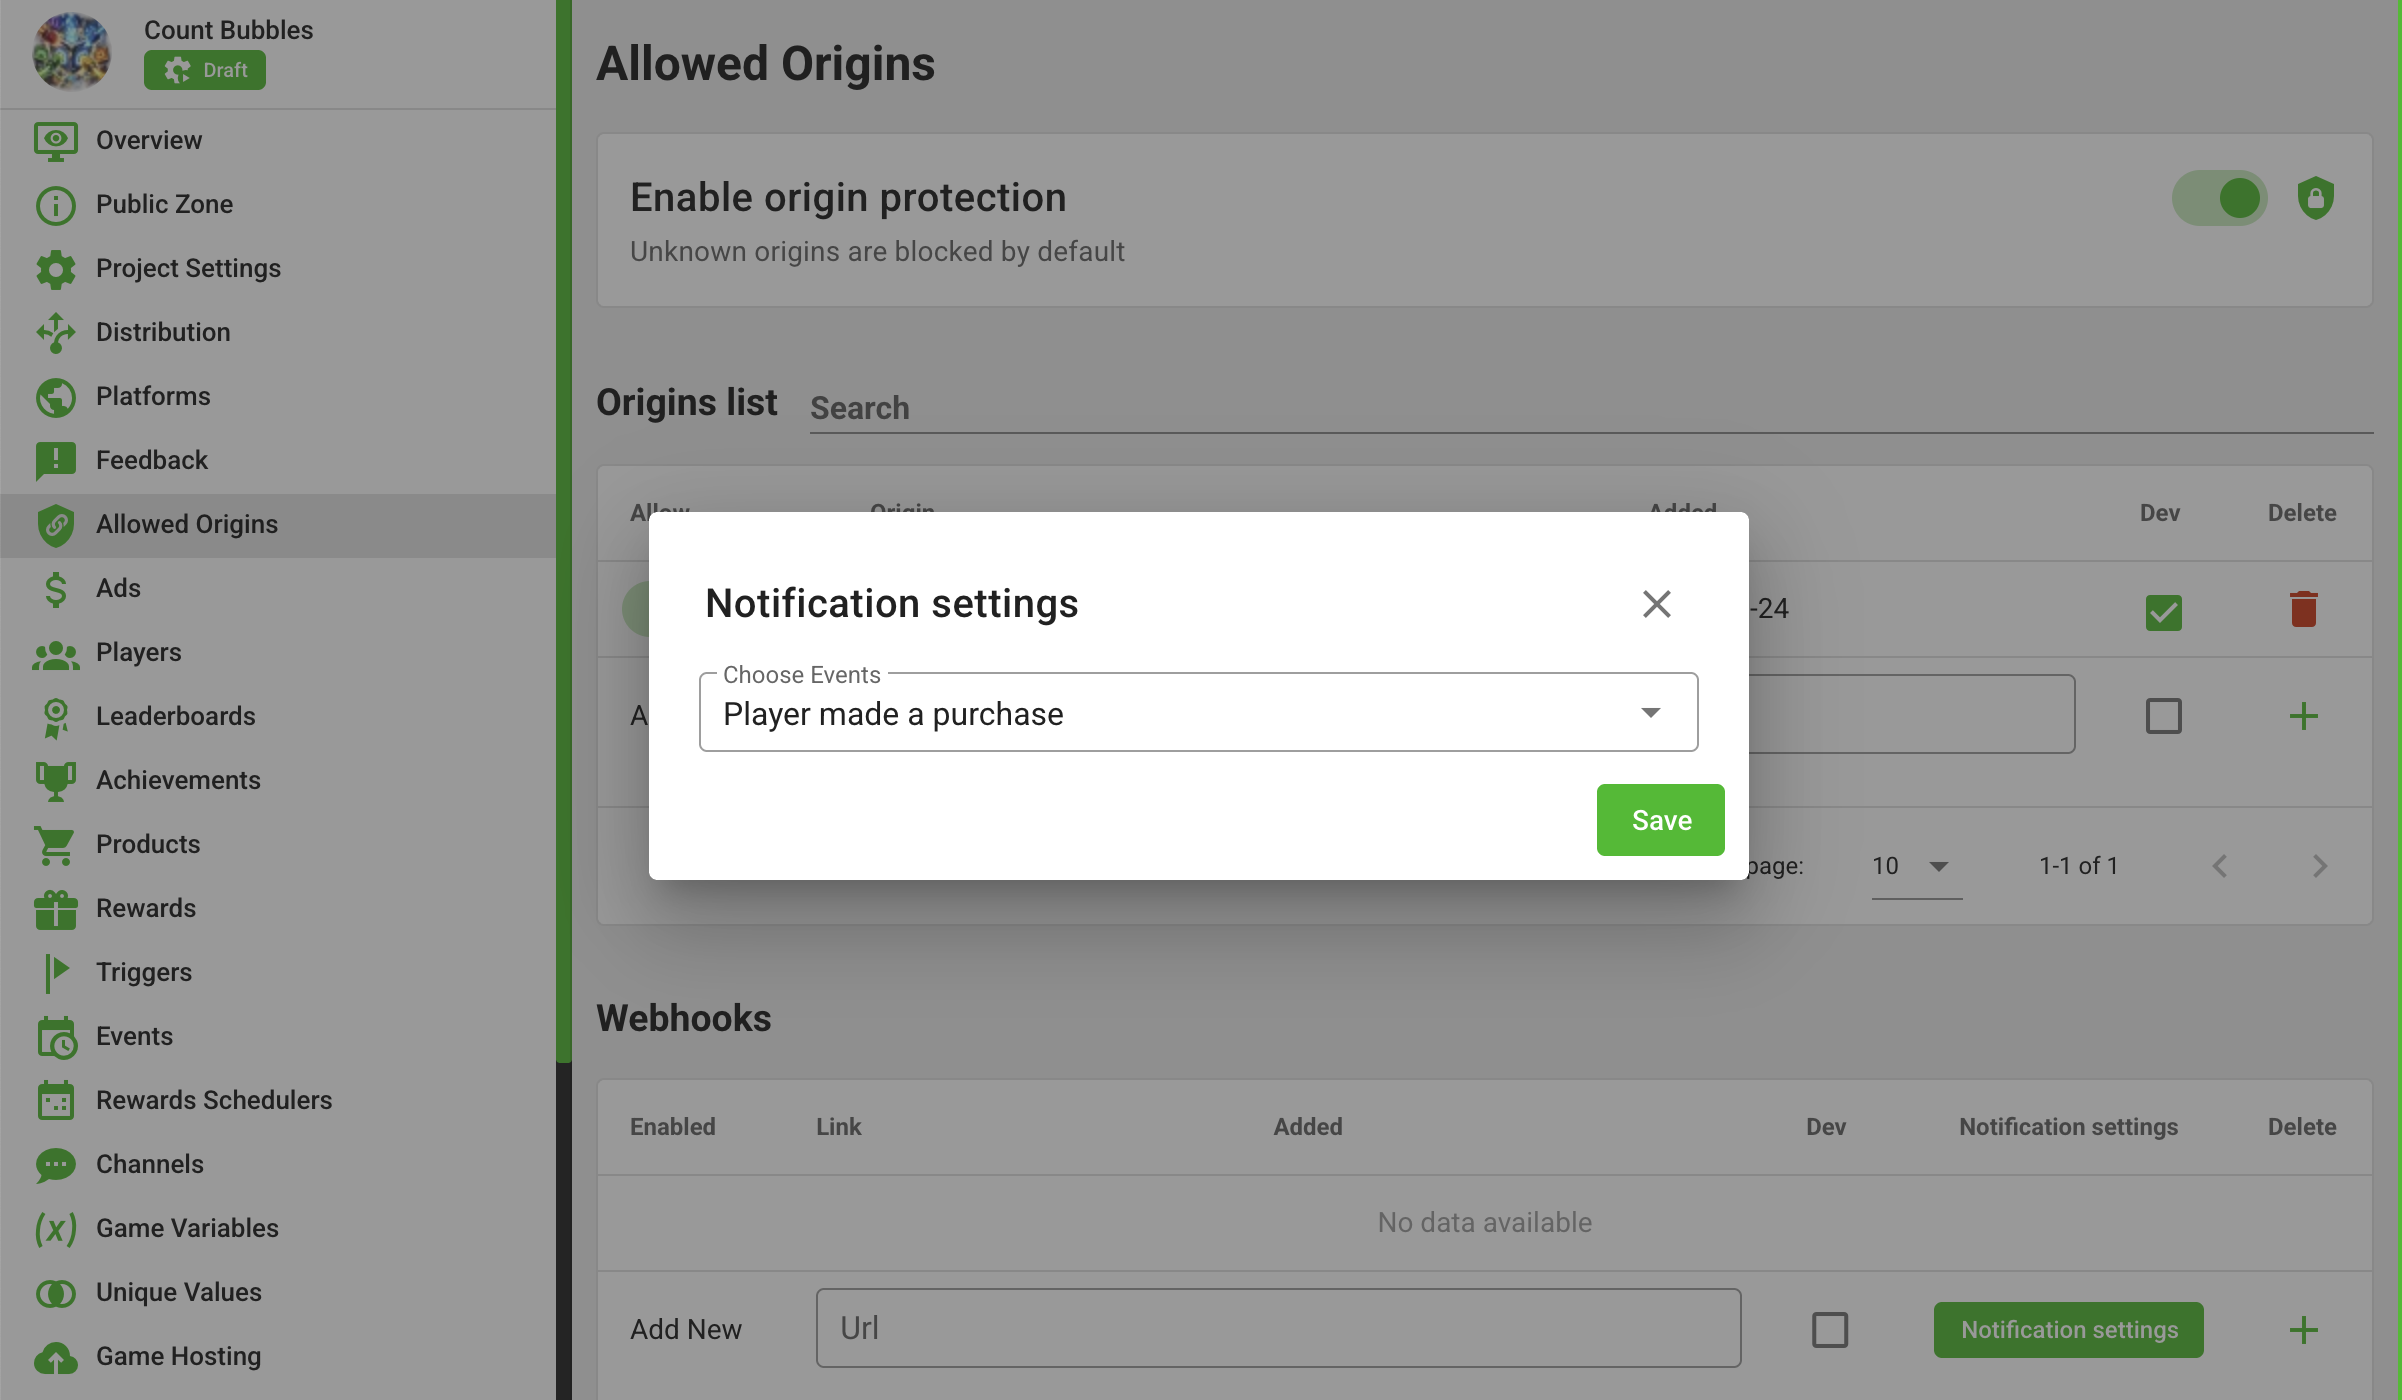
- In Notification settings select the events you need. In the panel they are labeled as follows:
| In the panel | Webhook event |
|---|---|
| Player made a purchase | PurchasePlayerPurchase |
| Cancel player subscription | CancelPlayerSubscription |
| Resume player subscription | ResumePlayerSubscription |
| Expire player subscription | ExpirePlayerSubscription |
For one-time purchases the first event is enough. For subscriptions enable all four.
Webhook body: base64payload.signature (not a JWT). The signature is SHA-256 of base64payload_secretKey, where secretKey is the project secret from Public Zone. Full format: Webhooks.
import crypto from 'node:crypto';

function readWebhook(body, projectSecret) {
    const [encoded, signature] = String(body).split('.');
    const expected = crypto
        .createHash('sha256')
        .update(`${encoded}_${projectSecret}`)
        .digest('hex');

    if (expected !== signature) throw new Error('invalid_signature');

    return JSON.parse(Buffer.from(encoded, 'base64').toString('utf8'));
}
After signature verification:
- handle
PurchasePlayerPurchase; - grant only when
purchase.orderStatus === 'PAID'; - take reward amounts from your server by
product.tag, not from the client; - one
purchase._id→ one grant; a repeated webhook with the same_idmust not grant again.
Subscriptions
A subscription uses the same purchase webhook plus cancel / resume / expire events (see the table above). Store the access end date on your side (and an auto-renewal flag if you need it). Check access by that end date: after auto-renewal is cancelled, the paid period usually still applies.
Confirm delivery (consume)
consume does not change your balance — it tells GamePush that you already processed this purchase. Call it only after a successful grant on your server.
Confirm delivery by the transaction _id, not by the product tag as a whole:
await gp.payments.consume({ purchaseId: purchase._id });
The same product (GOLD_1000) can be bought many times — each payment has its own _id. You can confirm from the server via the GamePush API as well; on the client the SDK is usually enough. See Payments.
On game start, check gp.payments.purchases: if you already granted but never called consume, confirm by _id. Otherwise the player may have closed the tab right after payment.
8. Show ads
In the SDK, ads are handled by the gp.ads manager: it shows videos and banners on the platform. Before showing, check whether the format is available right now — that depends on the platform and frequency limits.
GamePush supports:
- fullscreen —
gp.ads.showFullscreen(); - rewarded video —
gp.ads.showRewardedVideo(); - preloader —
gp.ads.showPreloader(); - sticky banner —
gp.ads.showSticky().
if (gp.ads.isFullscreenAvailable) {
    await gp.ads.showFullscreen();
}

if (gp.ads.isRewardedAvailable) {
    const success = await gp.ads.showRewardedVideo();
    // success === true — the video was completed
}

if (gp.ads.isPreloaderAvailable) await gp.ads.showPreloader();
if (gp.ads.isStickyAvailable) await gp.ads.showSticky();
If you grant a server-side reward for watching an ad, an SDK response in the browser alone is not enough proof — you need your own server-side check.
Providers and block setup: Advertising.
9. Required SDK methods
Platforms need to know that the game has loaded, which UI language to use, and when to pause / mute audio. That goes through shared SDK methods — see Common features and Sounds.
Game ready
When resources are loaded and the first screen is ready for interaction, tell the platform:
await gp.gameStart();
Do not confuse this with gp.gameplayStart() / gp.gameplayStop() — those mark the start and end of gameplay (a round, a level), not game load. They do not start or stop your game logic by themselves.
Language
Language from the platform / SDK: gp.language (ISO 639-1). UI translation is on your side. Subscribe to language changes:
gp.on('change:language', () => {
    // update UI strings for gp.language
});
Pause
The SDK sets gp.isPaused and emits pause / resume (background tab, ads, and so on). On pause, stop gameplay and input on your side; the SDK does not cancel requests already sent to your server.
gp.on('pause', () => { /* pause the game */ });
gp.on('resume', () => { /* resume */ });
Sound
Before playing SFX / music, read the SDK flags. On mute / pause, stop current playback. Do not force sound back on after resume — read the flags again.
gp.sounds.isSFXMuted;
gp.sounds.isMusicMuted;

gp.sounds.on('mute', () => { /* stop audio */ });
gp.sounds.on('mute:sfx', () => { /* stop SFX */ });
10. Feedback
To let the player contact support from the game, open the built-in GamePush dialog:
await gp.feedbacks.open();
You do not have to build your own form and chat on the server for this: requests show up in the project panel under Feedback — reply to the player there, set statuses, and leave internal notes hidden from the player.
API and setup details: Feedbacks.
11. How to test GamePush SDK integration
Test the integration locally, on staging, and in the GamePush sandbox. Add test origins to Allowed Sites and mark them as Test so they stay separate from production.
Localhost
On localhost it is convenient to check SDK load, the player profile, authToken verification on your server, and session changes on login, logout, and account switch. Payment notifications do not reach plain localhost from the internet: for purchases you need a public URL (tunnel) or check payments on staging.
Staging (dev origin)
The main check before a platform. Add the staging address to allowed sites and point the test webhook at the staging server. Walk the full cycle: purchase → signature check → grant by purchase._id → consume. For a subscription, separately check that after auto-renewal is cancelled, access remains until the paid period ends.
GamePush sandbox
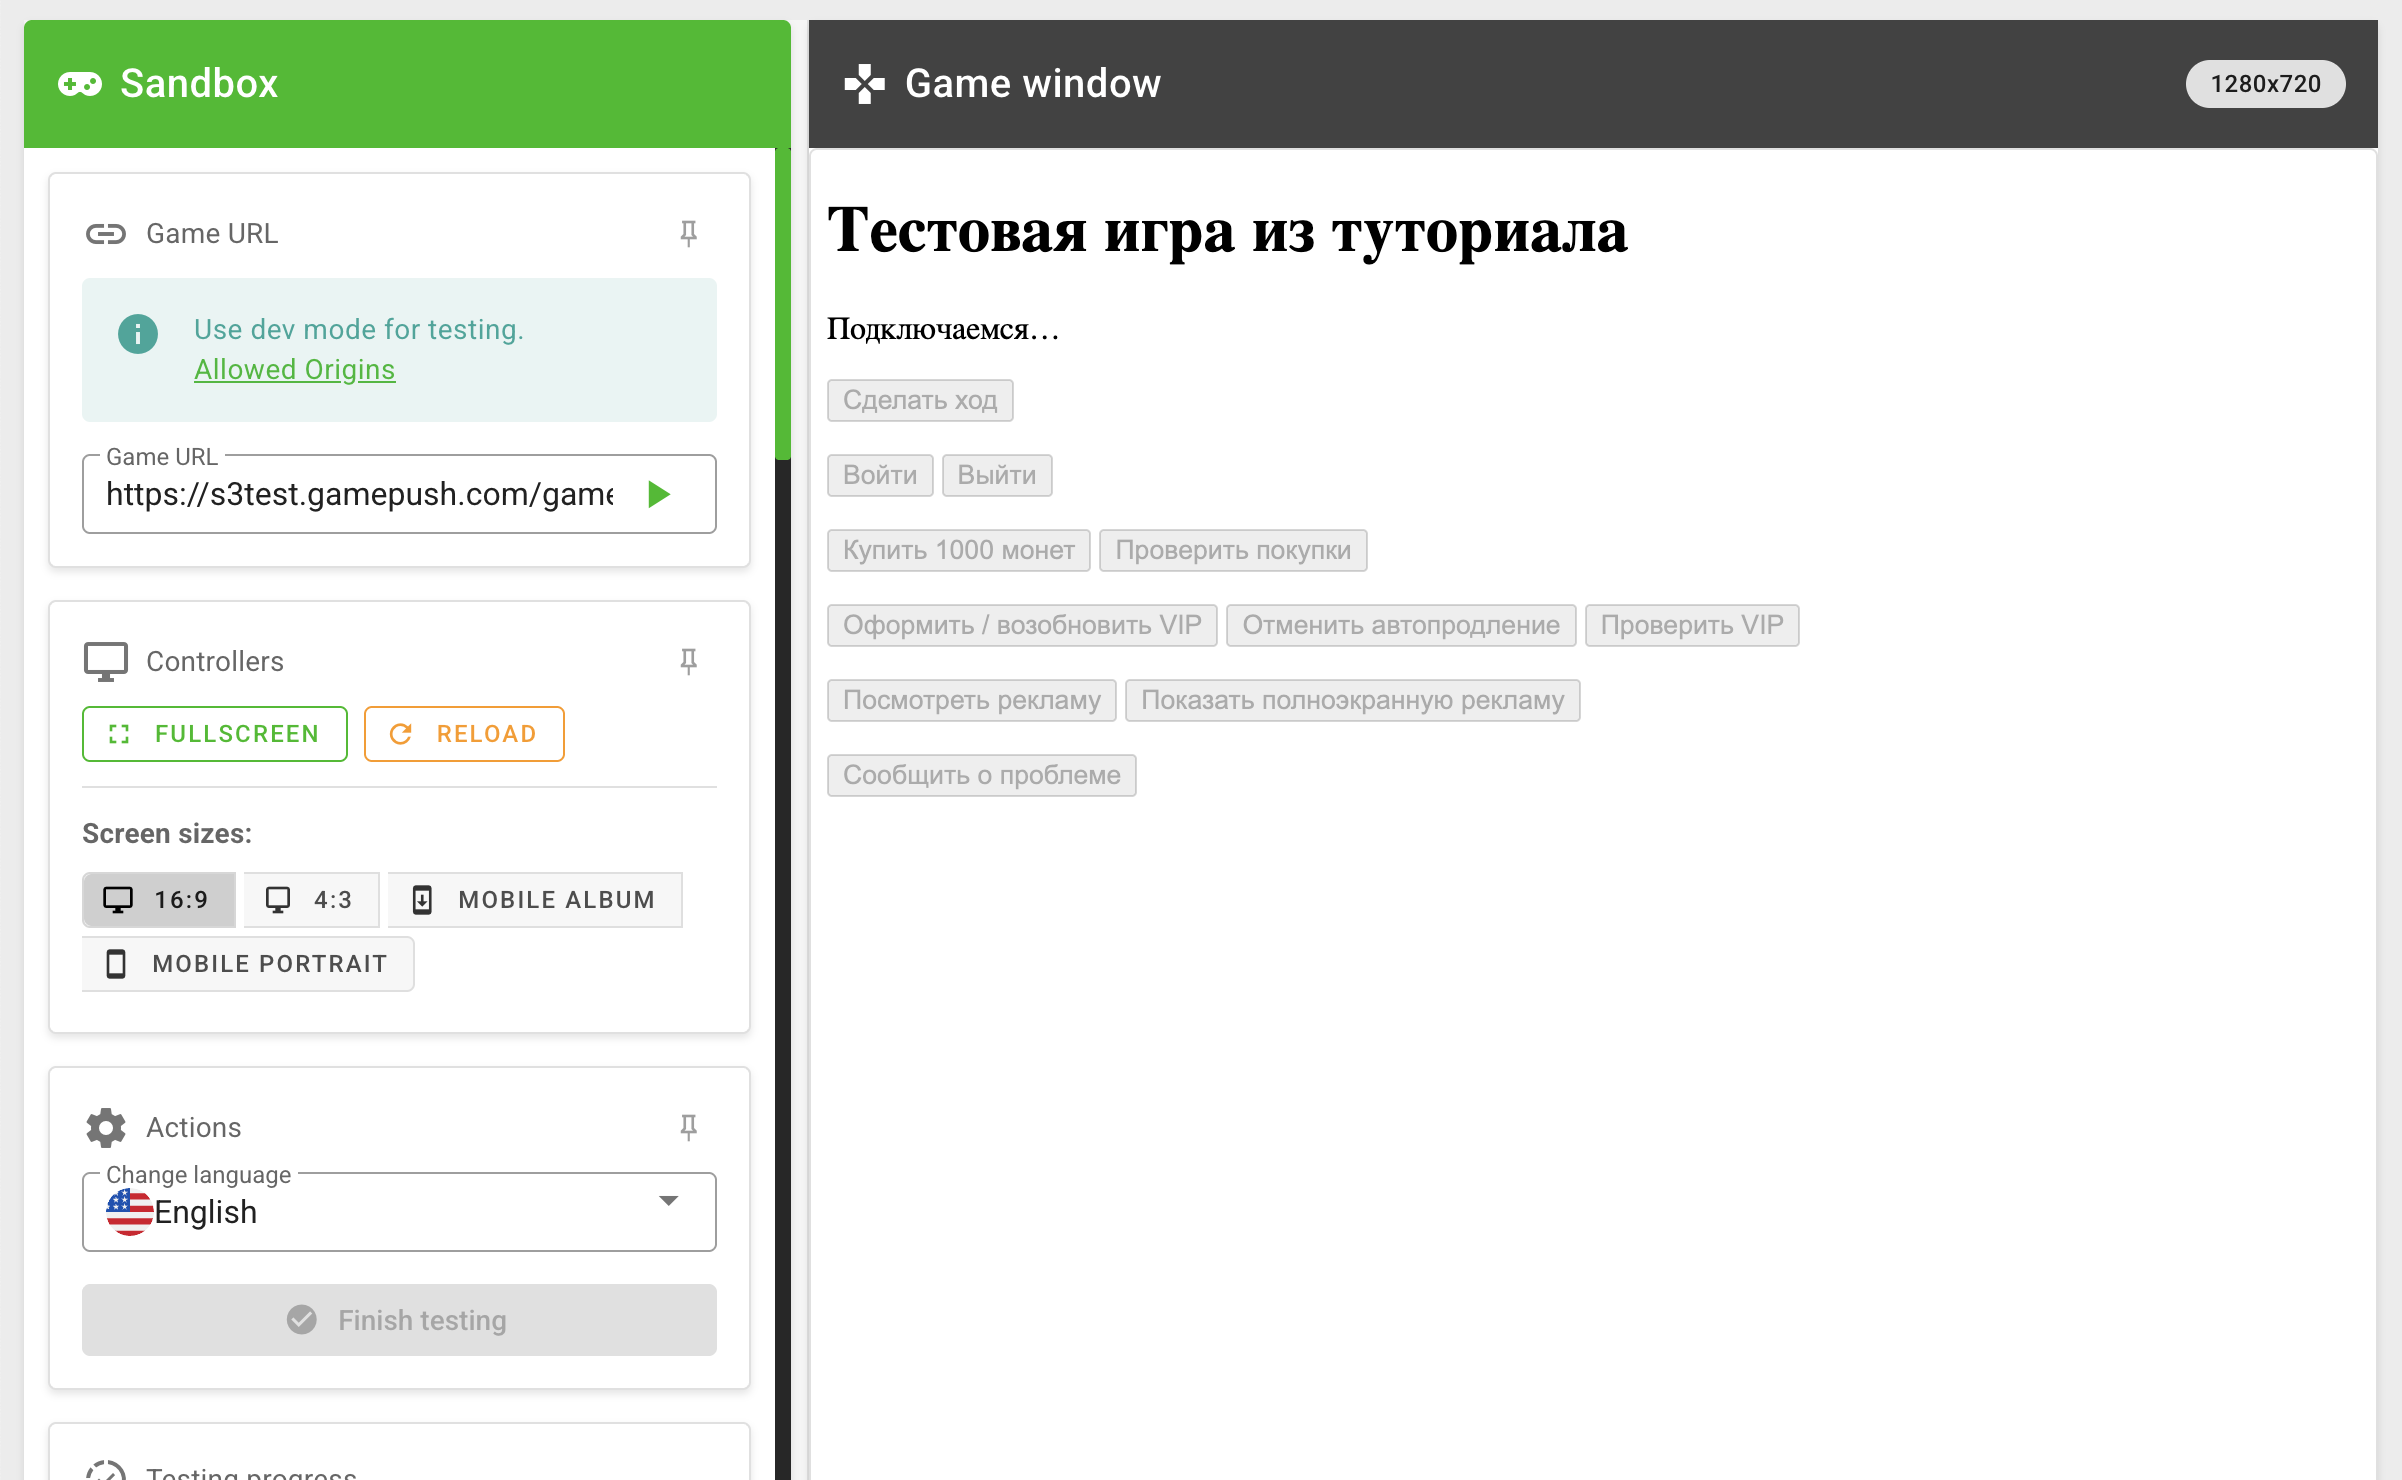
Open the sandbox from Game Hosting in the project panel: upload a build or set your own build URL (staging / tunnel) and click Test game. You can check gameStart, pause, mute, language changes, ads, and feedback without publishing to a platform.
Check scenarios
Also verify:
- screen changes and “play again” do not reload the page inside the iframe;
- a repeated notification with the same
purchase._iddoes not grant the purchase twice; - if the tab is closed right after payment, the next launch finishes the grant and confirms it with
consumeby_id; - after guest login, account switch, and logout, you open a session for the current player ID.
If you need to inspect SDK behavior, enable logs with _gp_logs=1 in the game URL — see Debugging. In test mode developer tools are also available.
Before publishing, also test on the platform itself: login, purchases, and ads may differ from the GamePush sandbox. Before moderation, also follow the testing checklist.
12. What's next
Next, connect the game to the platforms you need and pass their moderation. Before submitting, follow the testing checklist.
Stay in Touch
Other documents of this chapter available Here. To get started, welcome to the Tutorials chapter.
GamePush Community Telegram: @gs_community.
For your suggestions e-mail: official@gamepush.com
We Wish you Success!